
When developing a Hypar function, it's useful to try it out in the context of a real workflow, so that you're not developing in a vacuum. We've added some new features to make this process more streamlined.
Once you've set up your function definition — even before you've finished developing it — you may want to test it with inputs and elements from a live Hypar workflow. This is especially useful when building a function that depends on other functions, as described in Connecting to other functions.
To test your function in a workflow, choose Test Function on Hypar from the Hypar panel.

You'll have the option to specify either an existing workflow, or create a new one.
Option 1 - New Workflow
Most of the time, you'll want to create a new workflow to test with.
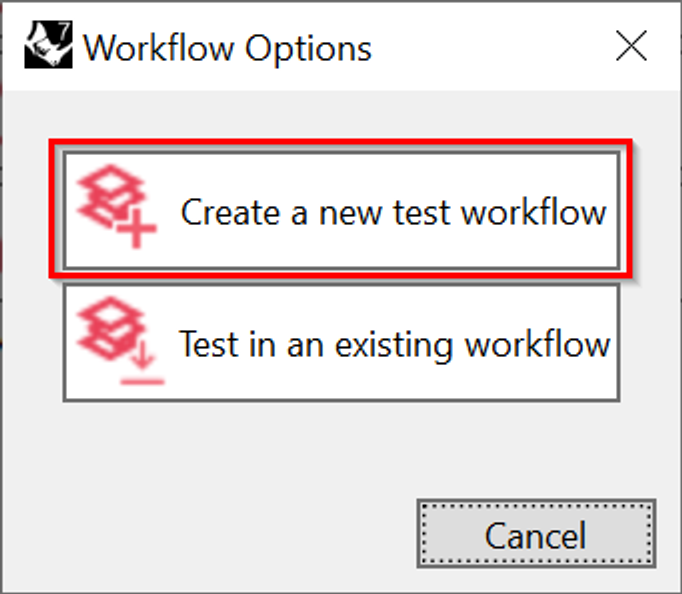
Choose a name and select Create and Open in Browser:
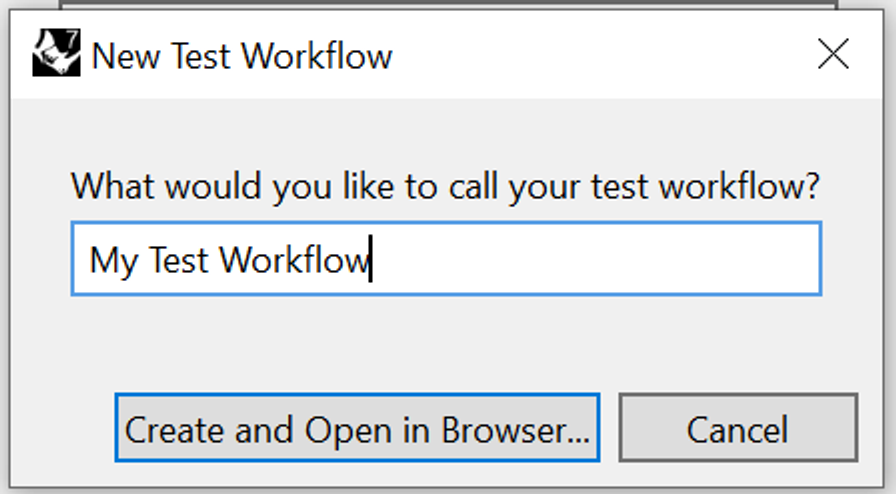
A new browser window should open with a new workflow containing your function.
Proceed to Testing your Function
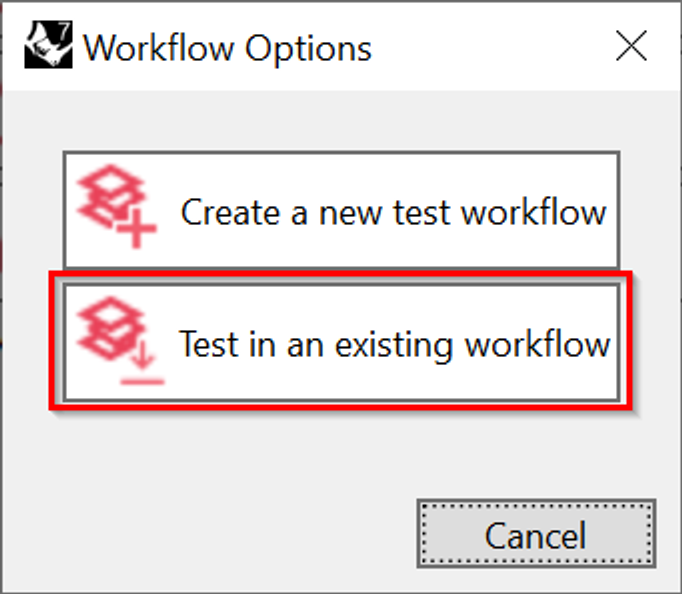
Option 2 - Existing Workflow
If you already have a workflow you want to test with, choose Test in an existing workflow.
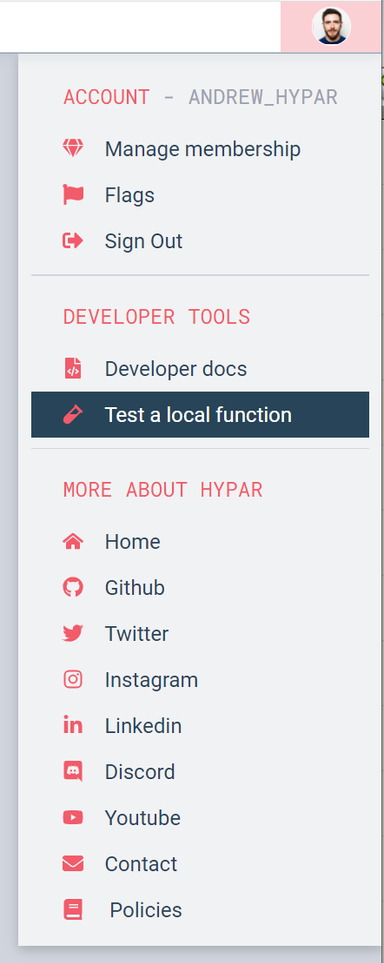
Open up your workflow on Hypar, and go to the menu in the upper right — select Test a Local Function
Click the button to copy the command:
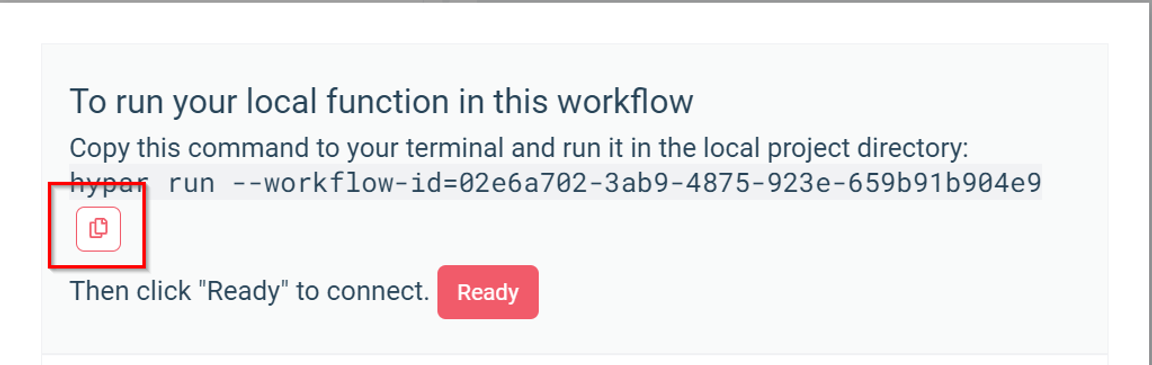
Then return to Grasshopper to paste in the dialog:
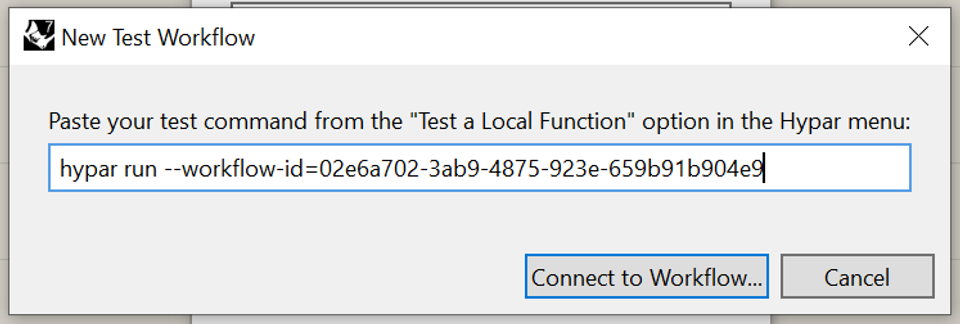
Click Connect to Workflow to start a test session.
Testing your Function
While your local function is connected to the workflow, it will respond automatically to updates in the workflow, even if you have yet to publish the Grasshopper logic for your function. If you update a model dependency, or an input on your function, the
Inputs component in your definition will feed those changes into your definition, so you can test with real data. You can stop testing at any time and return to "local" mode, where the Inputs component just feeds through whatever you provide it.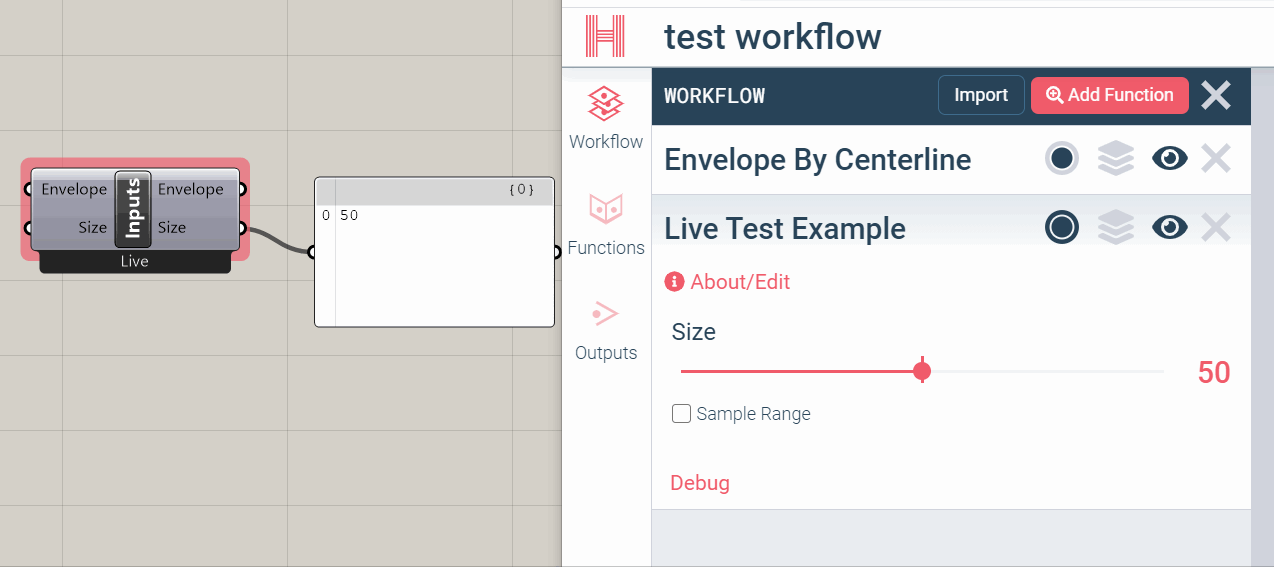
If you have model dependencies, you're likely to find that each dependency on your Inputs component contains multiple element types:
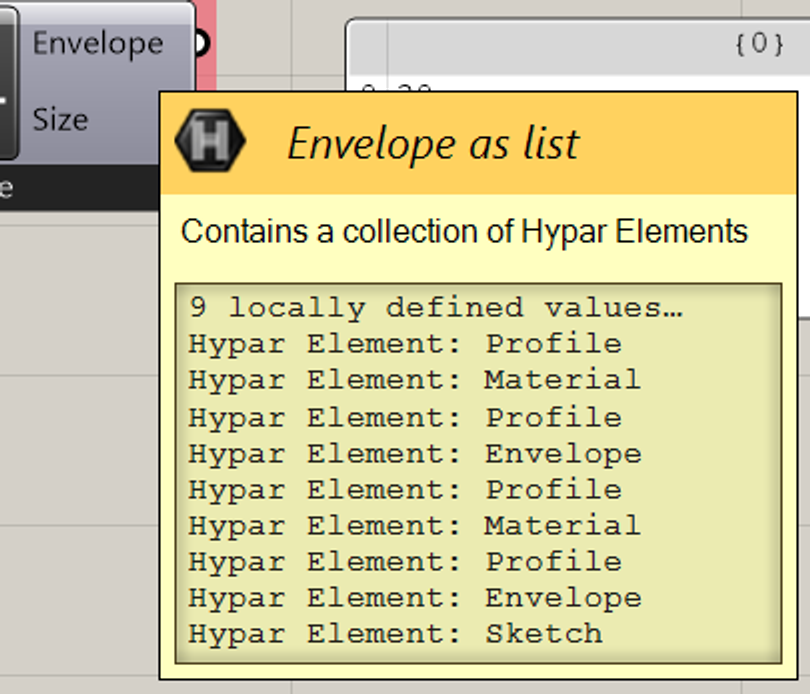
To make this easier to work with, use the
Elements By Type component.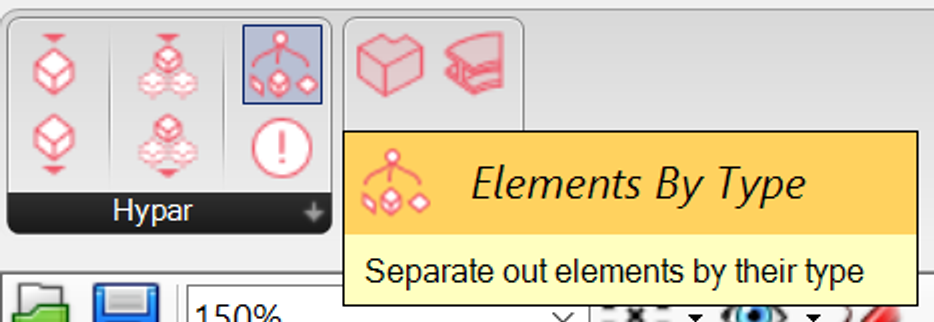
Then you can safely use
Deconstruct Element to access the elements coming in from other functions. Just connect it and it will automatically add the relevant outputs.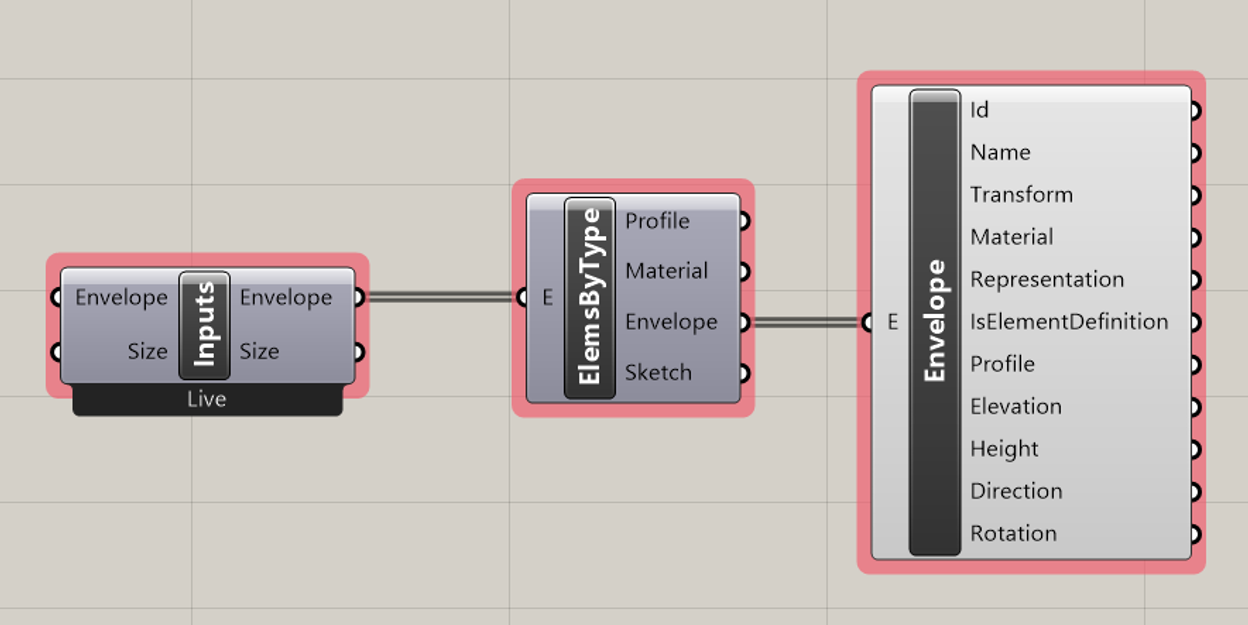
When you're finished debugging your function, be sure to update it on Hypar by choosing "Publish function to Hypar" in the Hypar Panel.

Passing Error messages to the UI
By default, any components with an error message will pass that error message along to the Hypar UI, to help you debug.
You can also produce custom messages and feed them into the
Output Messages component: 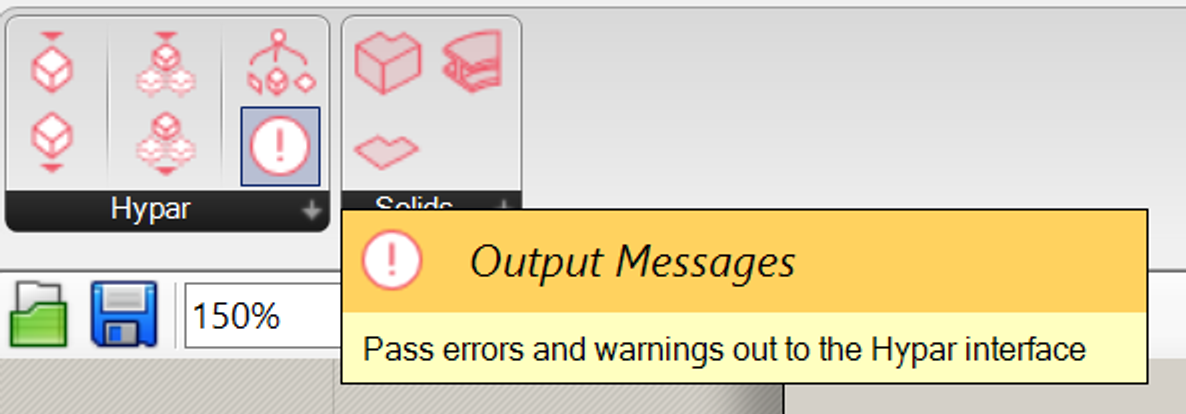
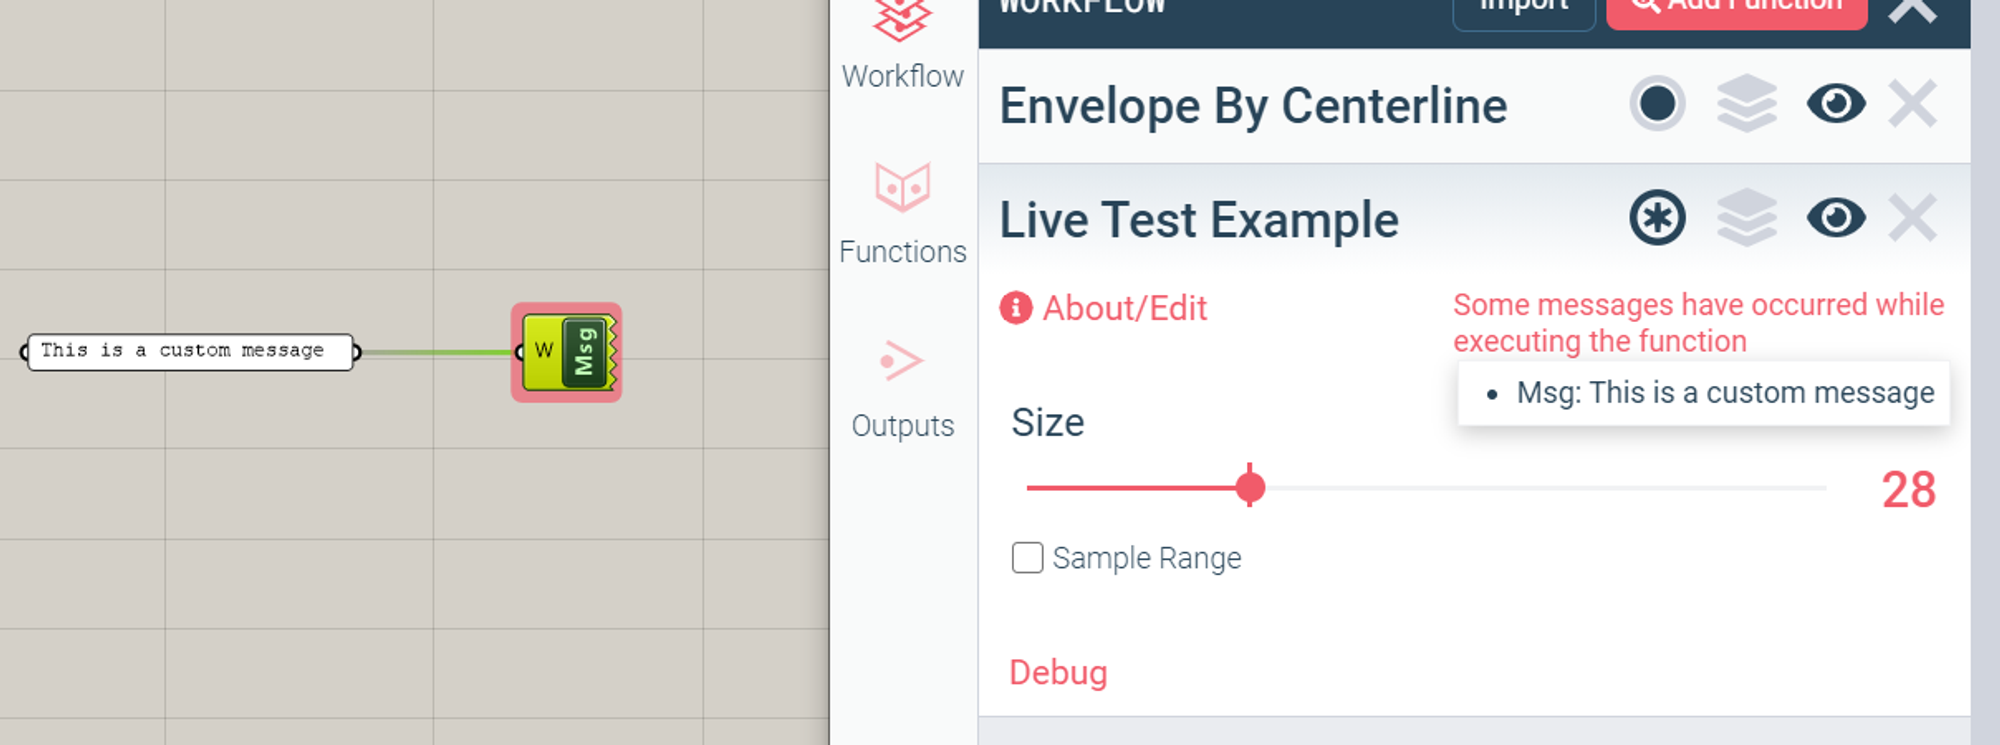
If you want to suppress an error or warning from another component, you can cluster it to keep the message from being passed to the Hypar UI.