
This document is for organization administrators. It describes how to configure Hypar authentication to use your company’s login system.
Google Workspaces
No configuration is needed if your organization uses Google for authentication. Just instruct your users to click “Continue with Google” on the Hypar sign-in page.
SAML on Azure
SAML setup involves your organization registering Hypar login on your side, and then giving the Hypar team the necessary information to enable your SSO provider.
SAML login requires an enterprise contract with Hypar.
Quick start
If you already know how to register a new Single Sign-On application with Azure, here are the important details:
- Identifier ID (Entity ID):
urn:amazon:cognito:sp:us-west-2_zqP9PvduV
- Reply URL (Assertion Consumer Service URL):
https://auth.hypar.io/saml2/idpresponse
- Add a Group Claim for
Groups assigned to the application, and set Source attribute toGroup ID
Detailed instructions
Step 1: Add a Hypar application to Azure Active Directory
- Log in to the Azure Portal.
- In the Azure Services section, choose Azure Active Directory.
- In the left sidebar, choose Enterprise applications.
- Choose New application.
- On the Browse Azure AD Gallery page, choose Create your own application.
- Under What’s the name of your app?, enter “Hypar” and select Integrate any other application you don’t find in the gallery (Non-gallery), as shown in Figure 1. Choose Create.

Figure 1: Add an enterprise app in Azure AD
Step 2: Set up Single Sign-On
- On the Getting started page, in the Set up single sign on tile, choose Get started, as shown in Figure 2.
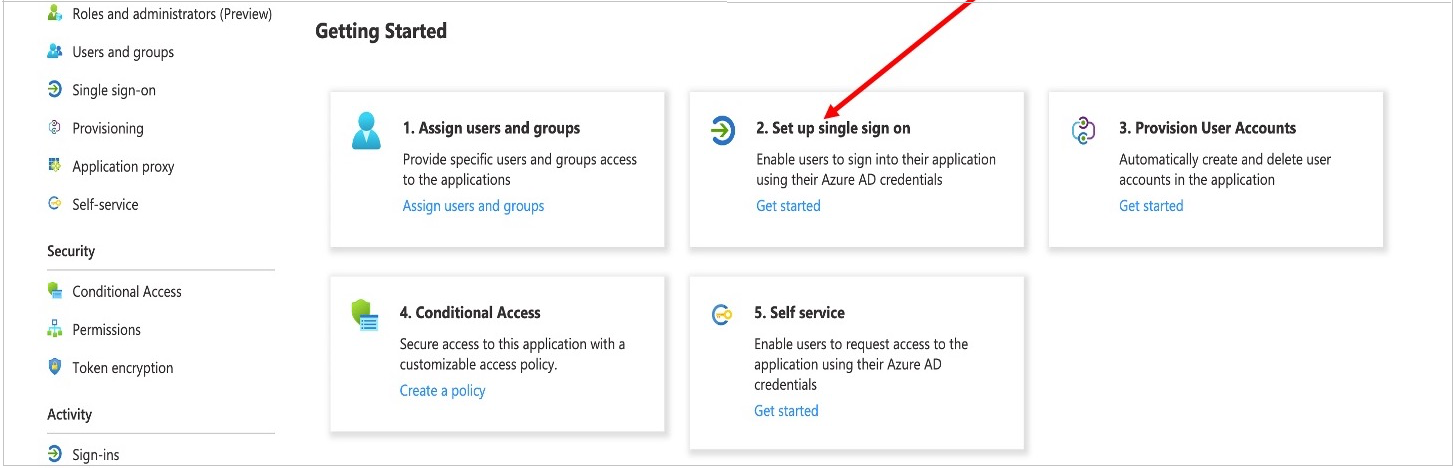
Figure 2: Application configuration page in Azure AD
- On the next screen, select SAML.
- In the middle pane under Set up Single Sign-On with SAML, in the Basic SAML Configuration section, choose the edit icon.
- In the right pane under Basic SAML Configuration, replace the default Identifier ID (Entity ID) with
urn:amazon:cognito:sp:us-west-2_zqP9PvduV. In the Reply URL (Assertion Consumer Service URL) field, enterhttps://auth.hypar.io/saml2/idpresponse. Choose Save.
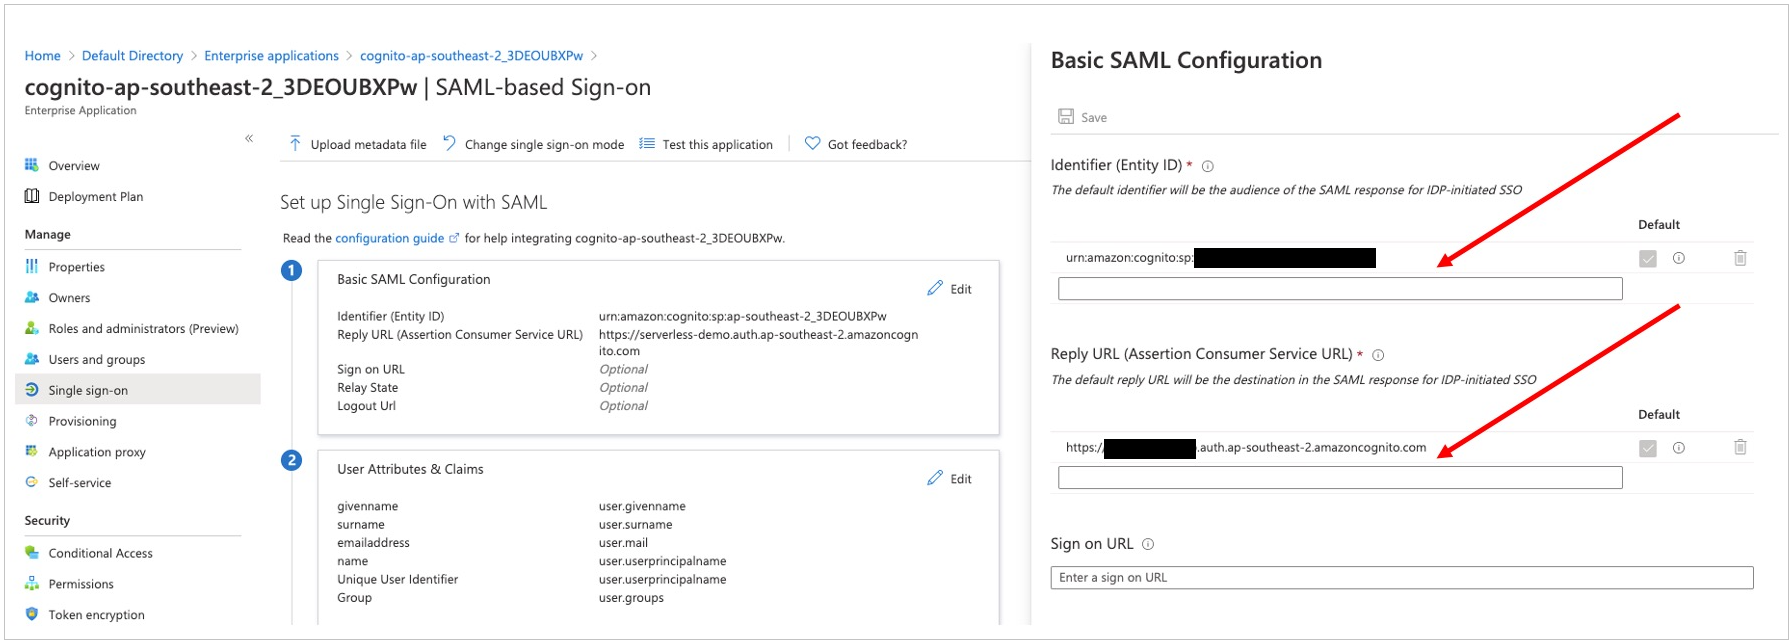
Figure 3: Azure AD SAML-based Sign-on setup
- In the middle pane under Set up Single Sign-On with SAML, in the User Attributes & Claims section, choose Edit.
- Choose Add a group claim.
- On the User Attributes & Claims page, in the right pane under Group Claims, select Groups assigned to the application, leave Source attribute as Group ID, as shown in Figure 4. Choose Save.
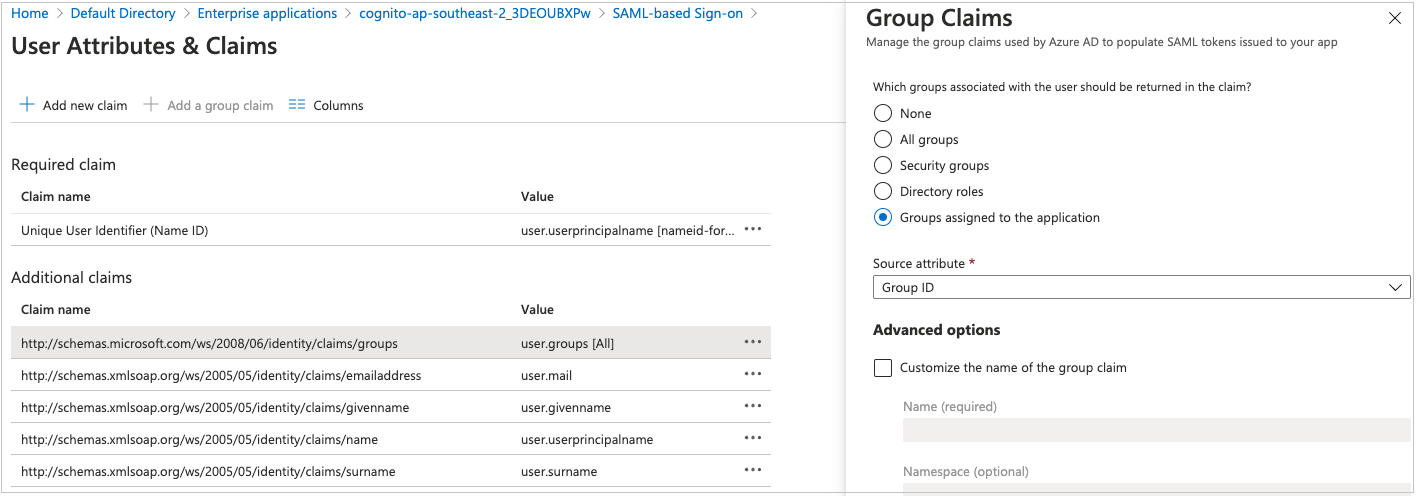
Figure 4: Option to select group claims to release to Hypar
- Close the User Attributes & Claims screen by choosing the X in the top right corner. You’ll be redirected to the Set up Single Sign-on with SAML page.
- Scroll down to the SAML Signing Certificate section, and copy the App Federation Metadata Url by choosing the copy into clipboard icon (highlighted with red arrow in Figure 5).
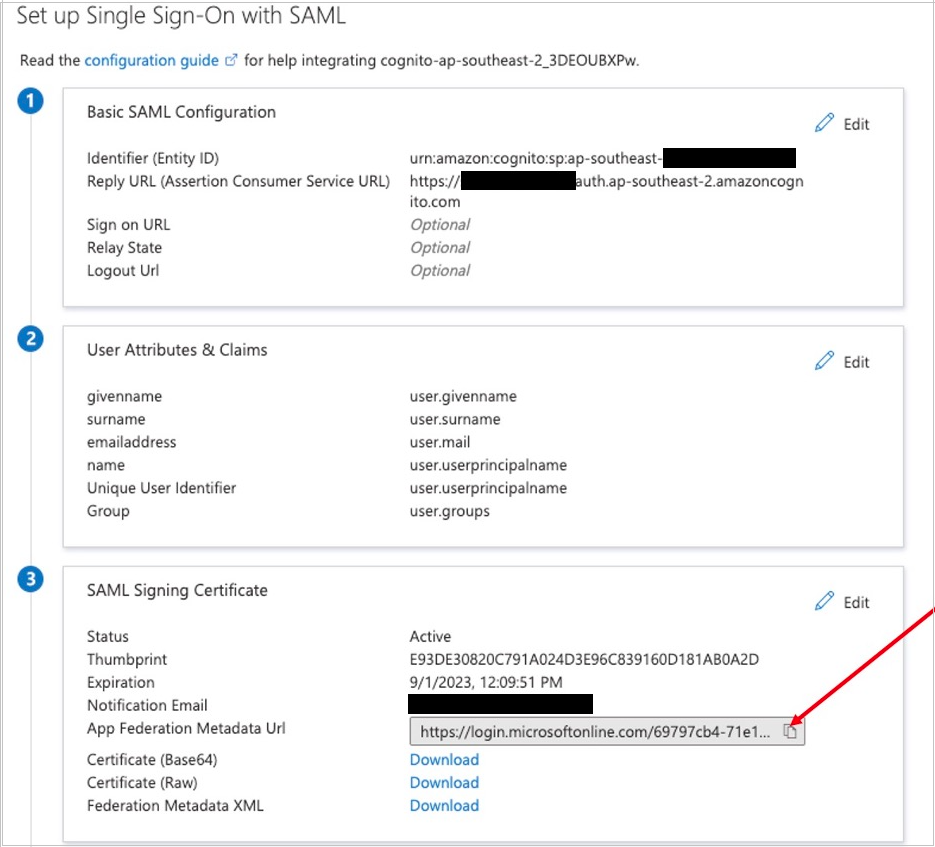
Figure 5: Copy SAML metadata URL from Azure AD
- Send the App Federation Metadata Url to your representative on the Hypar team.
OIDC
Hypar supports OIDC authentication but it is not yet documented. Please reach out to support@hypar.io to get set up.
OIDC login requires an enterprise contract with Hypar.