
Overview
Overrides are a mechanism to allow direct intervention into the results produced by a function. A function author can permit the user to modify the properties or geometry of elements produced by the logic of the function. You can think of overrides as special inputs, tied to specific elements produced by the function.
Overrides are "sticky": they persist through subsequent executions/iterations of a function, and are resilient to changes to other inputs or upstream dependencies. Here are some examples of the kinds of interactions you can enable with overrides:
- Your function might create a structural system, but permit overrides to the steel section for specific beams — even if you change the height of the building or the overall spacing.
- Your function might apply a facade pattern across an entire building, but allow using overrides to change the pattern for specific masses or faces — even if you add another mass to the project.
- Your function might generate a typical building core, but allow modifying its shape as a polygon — even if the building changes shape.
- Your function might assign a program to different spaces, but allow a user to override the space assigned to selected spaces — even if the floor changes shape.
Overrides is "some assembly required" — it needs some thoughtful design and work on the part of the function author to set up correctly. This is also what gives Overrides its flexibility as a framework — a wide variety of use cases and scenarios can be handled by this mechanism.
How they work

Since overrides are tied to specific elements, if the function does not produce any elements, then there is nothing to override. A typical sequence follows the flowchart above.
- The user sets the function's inputs.
- The function executes, using those inputs as variables to drive the elements it produces.
- The user edits the function's overrides, often by picking a specific element to override
- The function executes anew, with both the current inputs and the newly created overrides as variables to refer to when creating the new elements.
Note that there is nothing magic happening here — the overrides are just another variable the function author is responsible for interpreting and applying to the elements produced by the function.
How to support overrides for your function
There are a few pieces that must be in place in order to support overrides on your function.
- You must declare the override in the
overridessection of yourhypar.json(this must be done through manual editing — the function creator UI on hypar.io does not yet support overrides)
- You must create special logic to handle applying the override in your function code.
- You must call
Identity.AddOverrideIdentity()on the elements modified by an override, so that overrides can be reverted individually.
Example
Let's say we have a simple Core function, that has two inputs
Length and Width. These specify the dimensions of a rectangular Core element.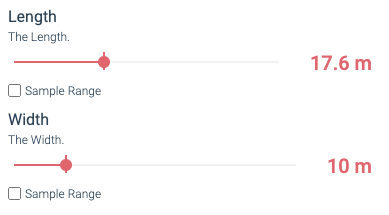
We would also like the user to be able to edit the polygon profile of this core object, in case the core is not rectangular. We could simply make a Polygon input, but then Length and Width would be irrelevant. Instead, let's create an override.
1. Setting up hypar.json
First, we'll set up our Hypar.Json to have the necessary inputs:
json"input_schema": {
    "type": "object",
    "properties": {
      "Length": {
        "type": "number",
        "description": "The Length.",
        "minimum": 1.0,
        "maximum": 20.0,
        "$hyparUnitType": "length"
      },
      "Width": {
        "type": "number",
        "description": "The Width.",
        "minimum": 1.0,
        "maximum": 20.0,
        "$hyparUnitType": "length"
      }
    }
  },
We'll add a reference to the
ServiceCore element type, so we can create ServiceCore elements with our function:json"element_types": [ "https://prod-api.hypar.io/schemas/ServiceCore" ]
And now we'll configure the
overrides. overrides is an object, which can have multiple keys — each key is a different override for your function. json"overrides": { // the name of the override "Cores": { // which elements are affected by this override "context": "[*discriminator=Elements.ServiceCore]", // a stable way to know that this element is THIS element "identity": { "Centroid": { "$ref": "https://hypar.io/Schemas/Geometry/Vector3.json" } }, // The properties of the object that are overridable. "schema": { "Profile": { "type": "object", "properties": { "Perimeter": { "$ref": "https://hypar.io/Schemas/Geometry/Polygon.json" } } } } } },
This might look intimidating, but let's break it down a bit.
Every
override has 3 main parts:context— This is a JSON Query for the elements you want to be available for overriding. This example specifies the query[*discriminator=Elements.ServiceCore]which means "All elements whose discriminator isElements.ServiceCore." The[*]syntax means "return all matches" — without this you will only get one item, and only one element will be able to be overridden. You will nearly always want to wrap your query in[*]. The next part,discriminator=Elements.ServiceCore, is the actual condition for the query. You can use any property, butdiscriminatoris a common choice to allow you to apply an override to all elements of a certain type. You can compose more complex queries with the JSON Query syntax;[*discriminator=Elements.ServiceCore&Name=MainCore]will give you all theServiceCoreelements with aNameof "MainCore."
identity— This is a piece of information used to uniquely identify the element being overridden. At first this may seem unnecessary. Couldn't we just use the element'sid? The problem is that if on my first execution, I generate a core with anidofb53, and apply an override to that, when my function executes a second time, there is no longer any way to know whatb53meant — the function cannot tell which element to apply the override to. Don't worry if this is still confusing: once we look at the C# implementation we have to write, this will become clearer. In our case, we set the identity to be the Core'sCentroidproperty, which is aVector3. It is important that theidentitymap to a subset of the Element's own properties — we can useCentroidas the identity becauseServiceCorehas aCentroidproperty.
schema— This defines what properties can be edited by the user of your function. There shouldn't be any overlap between the properties you used foridentityand the ones you specify inschema—identitycontains the properties that are fixed and consistent, andschemacontains the properties that a user would change between executions. In our case we are overriding the polygonalPerimeterof theProfileof theServiceCoreelement. Just likeidentity, typically you want your schema to point to a subset of the properties of your Element itself. This is not strictly a requirement, but most use cases will work this way. In other words, avoid putting properties in theschemathat are not actually properties of the object.
This is a lot of complex information, but it will become clearer as we dive into the C# implementation. It becomes second nature once you have implemented
overrides a few times.2. Code generation
Just like with any other function, we generate C# code with
hypar init. With overrides, we get a new Overrides property on our MyCoreFunctionInputs class, which looks like this:c#public class OverridesExamplesInputs : S3Args { //... other properties like Length and Width public Overrides Overrides { get; set; } }
That
Overrides object will have properties corresponding to each override we configured. Each override gets its own class, which contains the Identity and Value information we specified in the identity and schema portions, respectively.
Simplified slightly:c#public partial class Overrides { public IList<CoresOverride> Cores { get; set; } } public partial class CoresOverride { public string Id { get; set; } public CoresIdentity Identity { get; set; } public CoresValue Value { get; set; } } public partial class CoresIdentity { public Vector3 Centroid { get; set; } } public partial class CoresValue { public CoresValueProfile Profile { get; set; } } public partial class CoresValueProfile { public Polygon Perimeter { get; set; } }
This means in our function, we can access a collection called
input.Overrides.Cores, and for each CoresOverride, we can access its Identity and Value.3. Handling overrides inside the function
Without overrides, our function would take in the inputs, produce a Core object, and pass it out to the output's
Model. Probably something like this: c#public static MyCoreFunctionOutputs Execute(Dictionary<string, Model> inputModels, OverridesExamplesInputs input) { var height = 4.0; var output = new OverridesExamplesOutputs(); var rectangle = Polygon.Rectangle(input.Length, input.Width); var representation = new Representation( new[] { new Extrude(rectangle, height, Vector3.ZAxis, false) }); var core = new ServiceCore( rectangle, 0, height, rectangle.Centroid(), new Transform(), BuiltInMaterials.Concrete, representation, false, Guid.NewGuid(), "Core"); output.Model.AddElement(core); return output; }
In order to support our override, we need to find the matching element, based on the override's
identity, and change its Profile according to the override's value.There are several ways to think about this. It is often easiest and most useful to create all your elements without overrides set on them at the beginning of the function, and then pass through and modify them with overrides at the end. You could also look at the
overrides at the very moment you're creating the element for the first time, and apply changes there. Ultimately, how you structure this is up to you!c#public static MyCoreFunctionOutputs Execute(Dictionary<string, Model> inputModels, OverridesExamplesInputs input) { var height = 4.0; var output = new MyCoreFunctionOutputs(); var rectangle = Polygon.Rectangle(input.Length, input.Width); var representation = new Representation( new[] { new Extrude(rectangle, height, Vector3.ZAxis, false) }); // 1. Create an intermediate collection to store any // elements that might be overridden List<ServiceCore> allCores = new List<ServiceCore>(); var core = new ServiceCore( rectangle, 0, height, rectangle.Centroid(), new Transform(), BuiltInMaterials.Concrete, representation, false, Guid.NewGuid(), "Core"); // 2. Add core to the intermediate collection allCores.Add(core); // 3. Check if there are any overrides if (input.Overrides != null && input.Overrides.Cores != null) { // 4. Loop over the override collection foreach (var coreOverride in input.Overrides.Cores) { // 5. find the matching element, based on identity var identity = coreOverride.Identity; // find the core whose Centroid is closest to our Identity var matchingCore = allCores.OrderBy( c => c.Centroid.DistanceTo(identity.Centroid)) .FirstOrDefault(); // 6. apply relevant changes // note that the "Profile" property coming back is not a // "Profile" element — it's a special "CoresProfile" class // that only contains a subset of the properties of // a Profile. matchingCore.Profile = new Profile( coreOverride.Value.Profile.Perimeter); matchingCore.Representation = new Representation( new[] { new Extrude( matchingCore.Profile, height, Vector3.ZAxis, false) }); // 7. Add Override Identity to the modified element. Identity.AddOverrideIdentity( matchingCore, "Cores", coreOverride.Id, coreOverride.Identity); } } output.Model.AddElements(allCores); return output; }
Here are the steps we took:
- Create an intermediate
Listto store our elements before overriding and adding them to the model.
- Add the elements we produce to this list.
- Check if there are any overrides present.
- If there are, loop over the overrides we have.
- For each override object, find the already-created element it corresponds to, utilizing the override's
Identity
- If we find a matching element, modify it using the override's
Value.
- Apply
Identity.AddOverrideIdentity()to the modified element.
This example is a little bit contrived, because we're only creating a single
ServiceCore. However, in a typical real-world scenario, we would be producing potentially many elements, which might change based on model dependencies as well as inputs, so it is important to go through the steps of figuring out which elements to affect based on their Identity.
The resulting function will have new buttons available in the UI, which enable creating, editing, and reverting overrides:
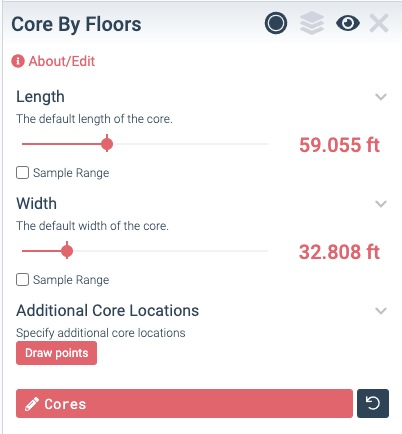
These buttons also show up on the popup that appears when you select an element:

Advanced topics
Current limitations
- Overrides cannot be applied to geometric + non-geometric properties at the same time. This means your
schemashould either contain to a single geometric property (a polyline, a vector3, a transform, etc), or a collection of non-geometric properties (strings, numerical values, etc). You can work around this by producing two overrides that have the same context — one for the single geometric property, and another for any non-geometric properties.
Custom verbs
You can change what the overrides buttons in the UI say by specifying
verbs. For an override called "Foo", typically the buttons will say Edit Foo or Revert Foo. However, with custom verbs, you can change this, as in this example:json"Merge Zones": { "verbs": { "edit": "Merge Zones", "revert": "Reset Merged Zones" }, "context": "[*discriminator=Elements.SpaceBoundary]", "identity": { "ParentCentroid": { "$ref": "https://hypar.io/Schemas/Geometry/Vector3.json" } } }
"Group" overrides
Your overrides declaration can also specify a different
paradigm. The default paradigm is edit, and can be left out. Currently, the only other paradigm supported is group, but this may expand over time. A group override lets you select multiple elements and specify that they should be treated as a group, or merged together. json"Merge Zones": { "context": "[*discriminator=Elements.SpaceBoundary]", "verbs": { "edit": "Merge Zones", "revert": "Reset Merged Zones" }, "paradigm": "group", "identity": { "ParentCentroid": { "$ref": "https://hypar.io/Schemas/Geometry/Vector3.json" } } }
See a full example of a group override in the
HyparSpace repository — look for Merge Zones in the hypar.json, and the merge implementation here, which handles taking two separate SpaceBoundary elements and combining them into one.Add/remove overrides
It is possible to make overrides that let you add new items from scratch, or remove existing ones.
See this section for details about Add/Remove behaviors for overrides.
Add/Remove OverridesPer-Parent overrides
It is possible to configure overrides to be scoped “per-parent,” so that when a user edits the override, they are only editing the values for one parent grouping at a time. For example, you might group overrides by a level parent, so that you’re only editing the objects on that level at one time.
See this section to learn more about configuring per-parent overrides.
Per-Parent OverridesCross-Function overrides (preview feature)
It is possible to create overrides from one function that attach information/editable properties to elements from a different function.
See this section for details about Cross-Function Overrides
Cross-Function OverridesWhat makes a good Identity?
One of the most difficult parts of designing effective overrides is deciding which properties to use for
Identity. It often takes a little bit of trial and error to get this to behave the way you expect it to. A few rules of thumb:
- Don't use
Idfor Identity, because it changes every time you execute, and won't be useful working backwards.
- Don't use
Namefor Identity, because it makes it hard to do "fuzzy" matches, and you're forced into constructing convoluted names that contain all of the relevant identity information.
- Do use geometric properties that correspond to an intuition about when one element is "the same" as another element. For
Cores by Floors, the identity is a Centroid, and that centroid is used to test for inclusion in a group ofFloorelements in the function's dependencies. Any core contained within a given contiguous set of floors is considered to be "The core" for that set of floors.
- Consider what kinds of changes your function is likely to encounter in real use. Will upstream geometry from a dependency change considerably? What inputs might change while users are experimenting? A good Identity will have the same value through any reasonably expected set of input/dependency changes.
Special behaviors
There are some special cases of UI behavior for specific kinds of geometric overrides.
- Single context match
If your
Contextquery only yields a single element, then editing the override will take you directly into editing that element, without requiring the intermediate step of picking which element to override.
- Multiple points
If your override's schema points to a
Vector3property, then editing the override will show all points for relevant elements at the same time, instead of requiring you to pick an element first.
- User Override vs Magic
If you want to indicate to a user that this property can either be fixed by the user, or be set automatically by the function you may add the
"isAutomated": true flag to your override. This will change the UI for the override to include a User/Magic toggle button.
- Transforms
In the case that your override's schema is a
Transform, the UI will apply that transform dynamically to the associated element in the 3d view, without requiring you to wait for an execution to complete. This is useful in cases where you simply want to allow a user to modify the position/rotation of an element.