
Rooms created in Revit can become Spaces - no need to redo your work!
Before getting started, make sure you have a Hypar account, Autodesk Revit installed, and the Hypar for Revit Add-in installed.
In order to bring your Revit Rooms into Hypar, you’ll need to export your Room from Revit and then import it to the Content Portal in Hypar.
Part 1: Export your Room from Revit
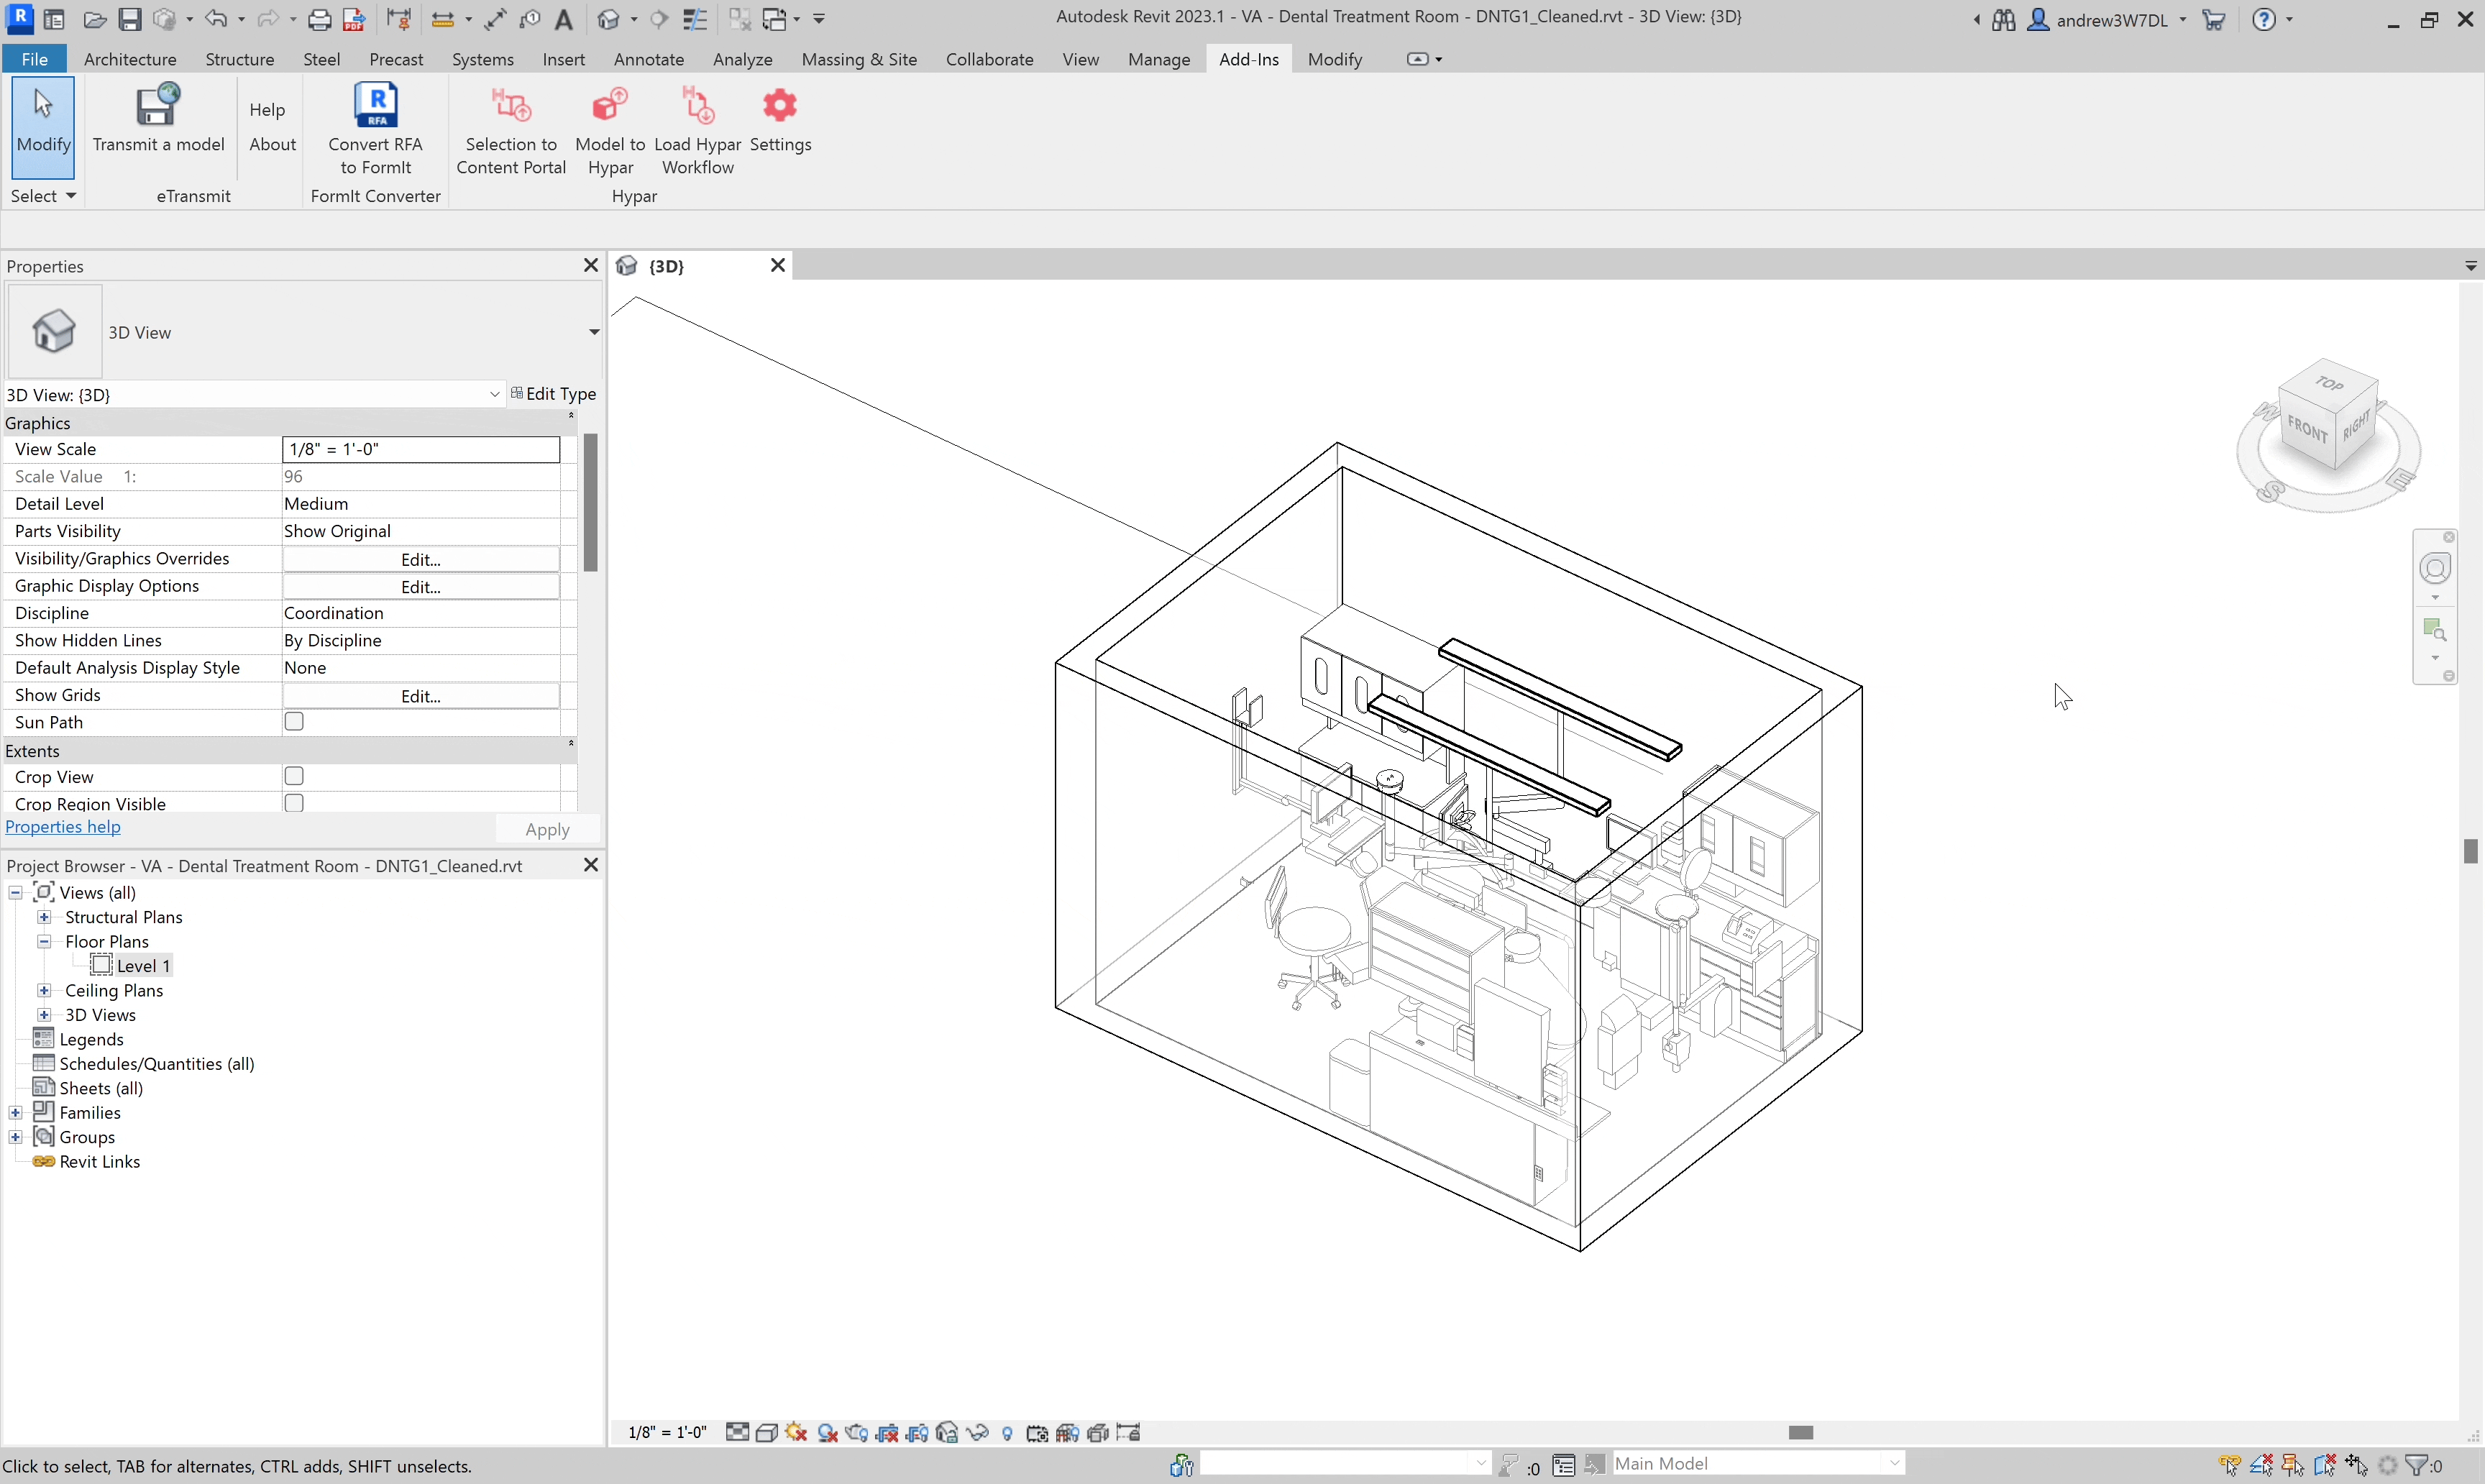
Start by opening your Revit file that contains the Spaces you want to export.
Step 1: Select content and room boundaries
In your Revit project, select all the Revit Rooms that you want to export.
- Only content within a selected Revit Room will be exported.
- Selecting multiple rooms at once will export a collection of variants.
- Variants are different configurations or sizes of rooms, all belonging to the same Space. For example, you might have variants of a meeting room, each representing a distinct layout or size while serving the same purpose. These variants allow Hypar to automatically select the most appropriate room configuration for the space.
- Be sure all relevant content is within the room boundary.
- Only 3D elements will be exported from Revit, 2D elements like annotations and details will not be included.
Step 2: Export the space
Once you’ve selected the desired room boundaries, navigate to the Add-Ins tab on the Revit toolbar, and then to the Hypar section. Click Selection to Content Portal to start the export.
Once export has completed, you’ll find a .zip file containing your selected elements on your computer.
Part 2: Import your room to the Content Portal
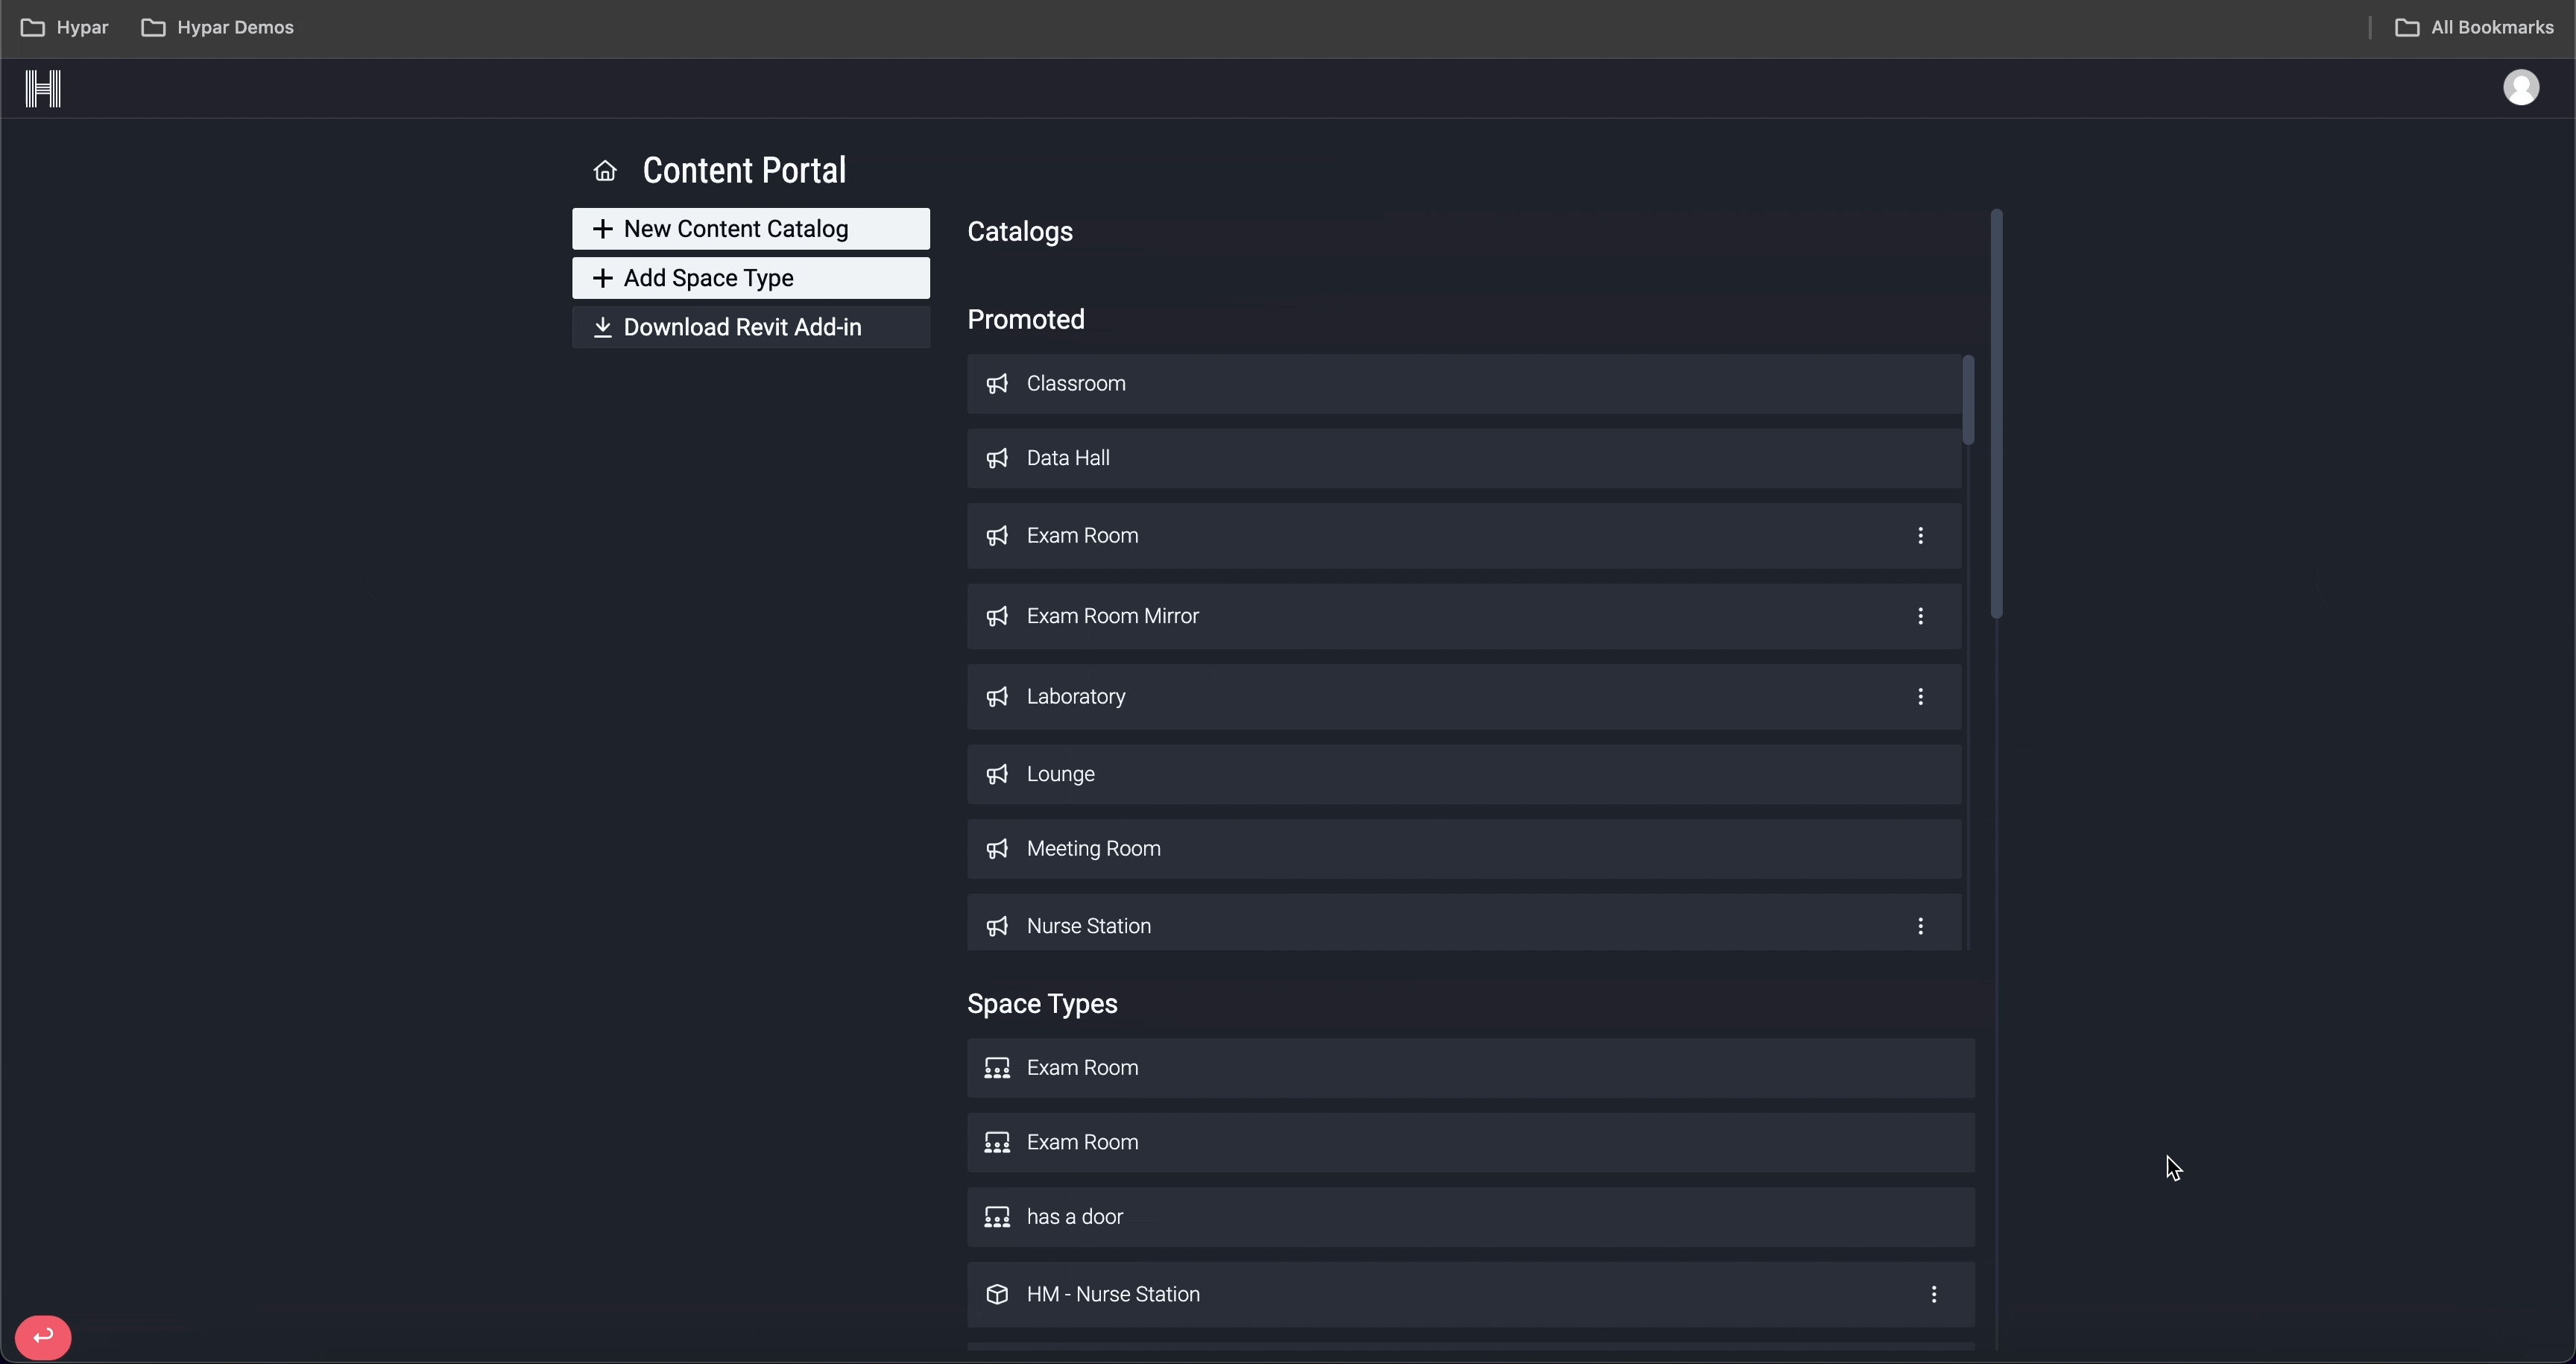
Explore the Content Portal
Go to hypar.io/content.
The Content Portal is where you can import and manage custom Space Types.
Step 1: Add a Space Type
Click + Add Space Type. A prompt will appear, allowing you to create a new Space Type. Click Add Content (.zip) to open a file browser or drag-and-drop a Space Type .zip file into the Upload section.
Step 2: Review your Space Type
After uploading the Space Type .zip file, you’ll see a page for your newly imported space type with a 3D preview of the space that you can explore. You can also view a schedule of all elements included in your export.
→ If your Space Type has variants or options, you can explore them by clicking Space Variant.
Step 3: Start designing
Your Space is now ready for use within Hypar!
Your Space Types, and any Hypar Space Types will be available for use in all workflows set up to use space types. Your team and collaborators will have access to any content you’ve included in a shared workflow, in the future you’ll also be able to share content directly with a team/group.

Explore the Hypar Space Planning Template and start creating spaces with your own custom content!