
Program requirements are the heart of Hypar: define what spaces you need and Hypar creates those spaces and tracks your progress against those targets as you plan.
Import from a spreadsheet (XLS, XLSX, CSV)
Often, you’ll start with a program or schedule of accommodation listing required rooms/spaces and their properties. Importing a program into Hypar is relatively quick and easy.
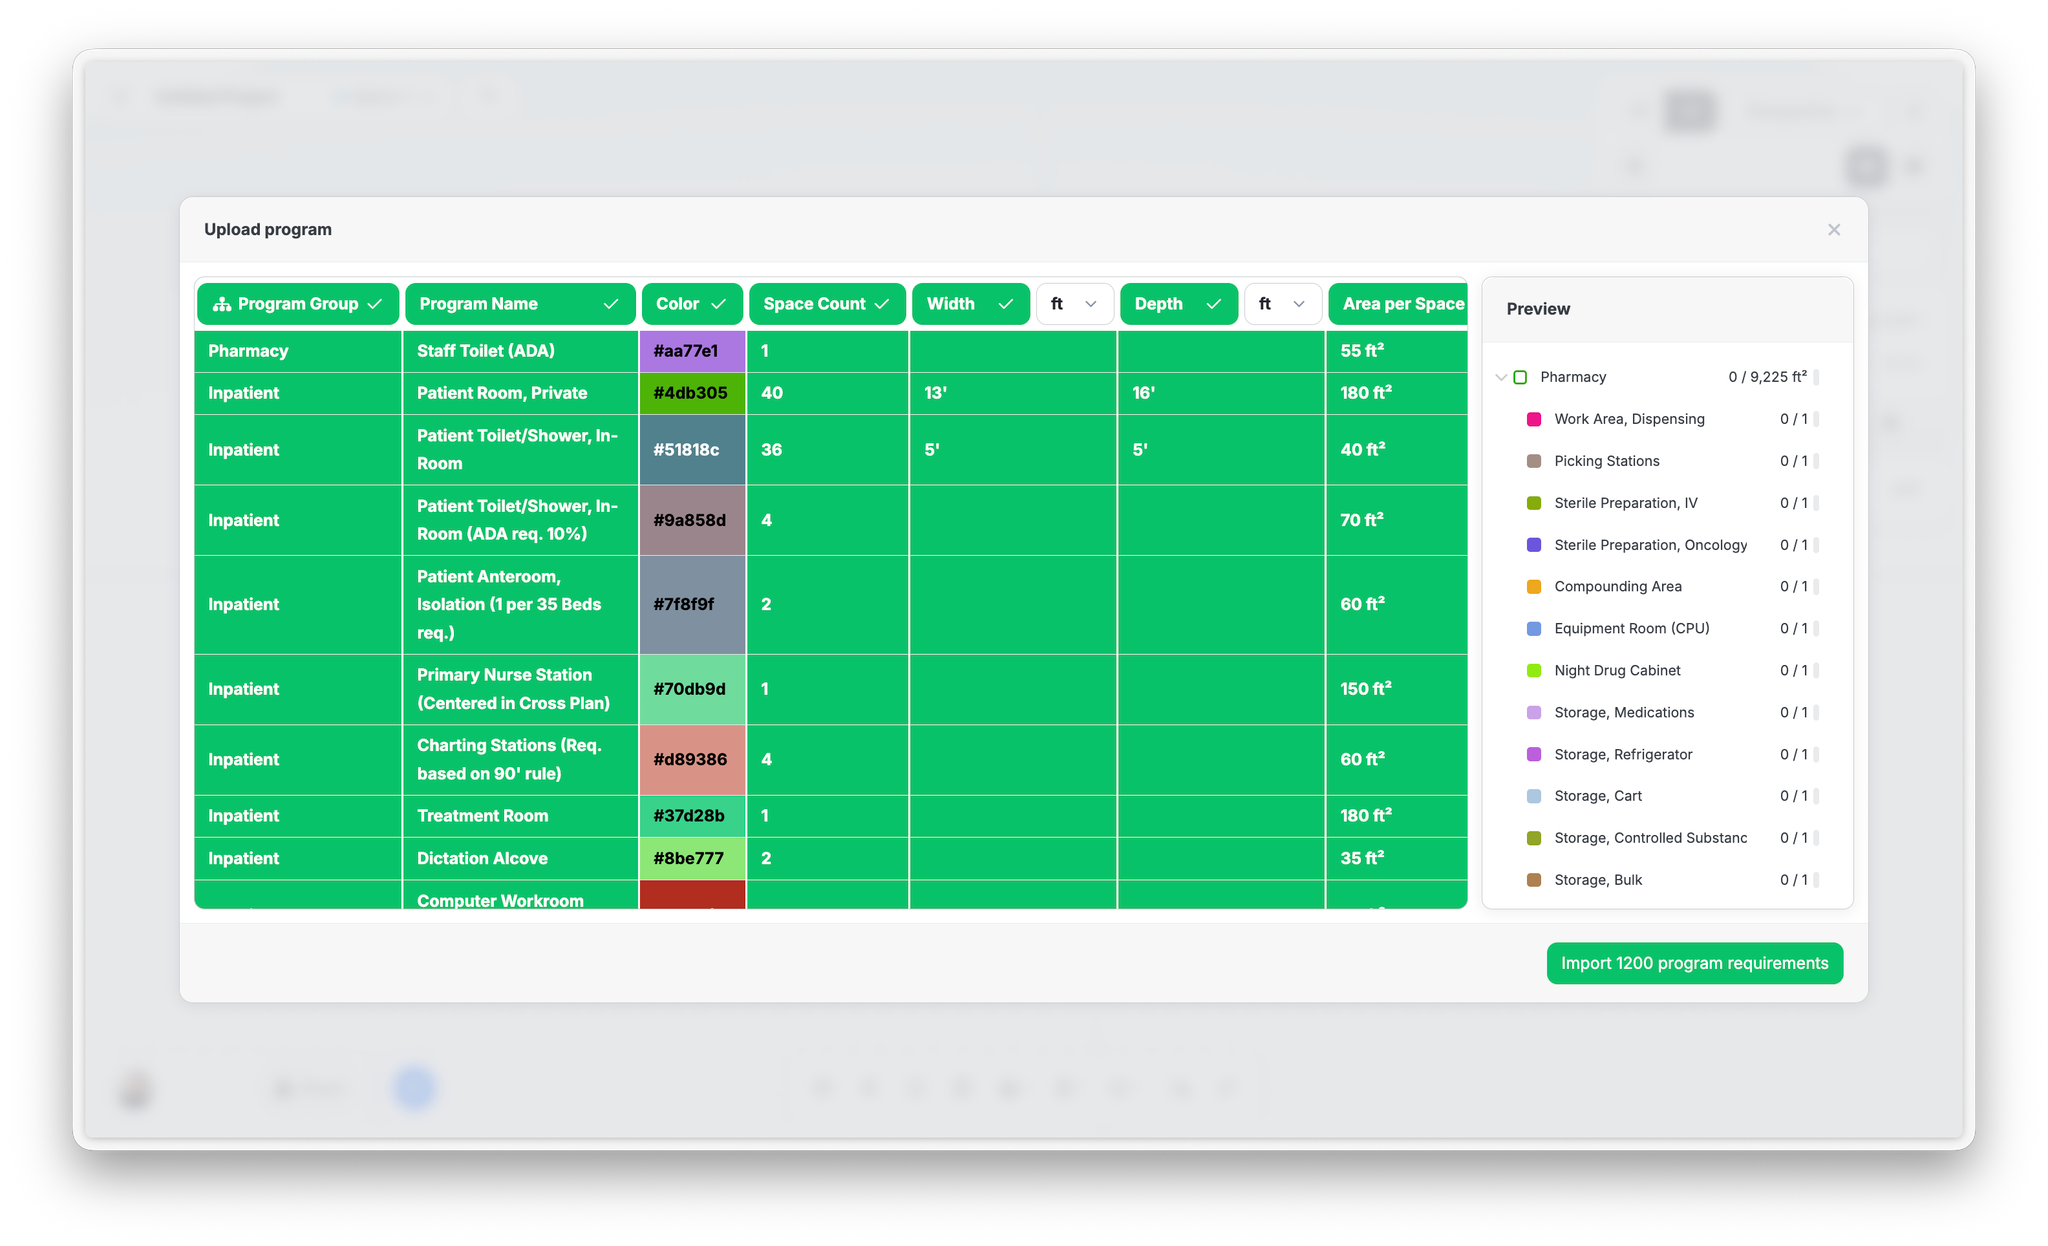
- In the metrics panel, click Import requirements... → Upload a spreadsheet and choose your file, or just drag and drop your spreadsheet onto the canvas. You can also import from the main menu.
- You don’t need to follow a specific program template so long as each space type is its own row.
- Make sure to close your file if its open in Excel first before importing.
- In order to create requirements, you will need to map your spreadsheet’s columns to Hypar’s simple categories. If you have multi-sheet workbooks, first pick the Sheet to import. You can also switch program units (imperial/metric) right in the mapping window. Hypar analyzes your spreadsheet and proposes column mapping automatically but you can remap any column to:
- Program Name: this is required, Hypar will not let you import your program without it
- Program Group / Department: this nests spaces into broader departmental or functional groups for tracking and program list management
- Area per Space in square feet or square meters. Hypar handles calculations so you don’t need to include a “total area” column.
- Space Count or quantity needed
- Width, Depth: this affects the default shape of your shapes. If there is no width or depth requirement, your spaces will come out square shaped. If width × depth disagrees with the area column (say, 10 ft × 12 ft mapped to 100 sf), Hypar prioritizes your dimensions but alerts you in the area requirements dropdown.
- Color: use hex or RGB. This is useful if you have firm color standards. If you don’t have colors, Hypar will auto assign colors to each space type that you can later change.
- Custom Property: keep any other column as data on the space. Custom properties can be text, numbers, whole numbers, lengths, areas, or value-per-area. This data round trips as a property to Revit.
- Check the Preview, then import. Rows to be imported turn green.
- If you need to edit your requirements, you can do so manually (see below) or by re-uploading your program. Re-importing updates your tracking only. Nothing you've placed on the canvas changes. Indicators in the mapping window show which requirements will be updated vs. added. Use a different sheet or revised file to bulk-update colors, counts, or add new space types.
Matching is by name. Hypar uses the space name to find what to update on re-import. If a requirement's name changed in your spreadsheet, it creates a new requirement rather than replacing the existing one.
Create or Edit program requirements manually
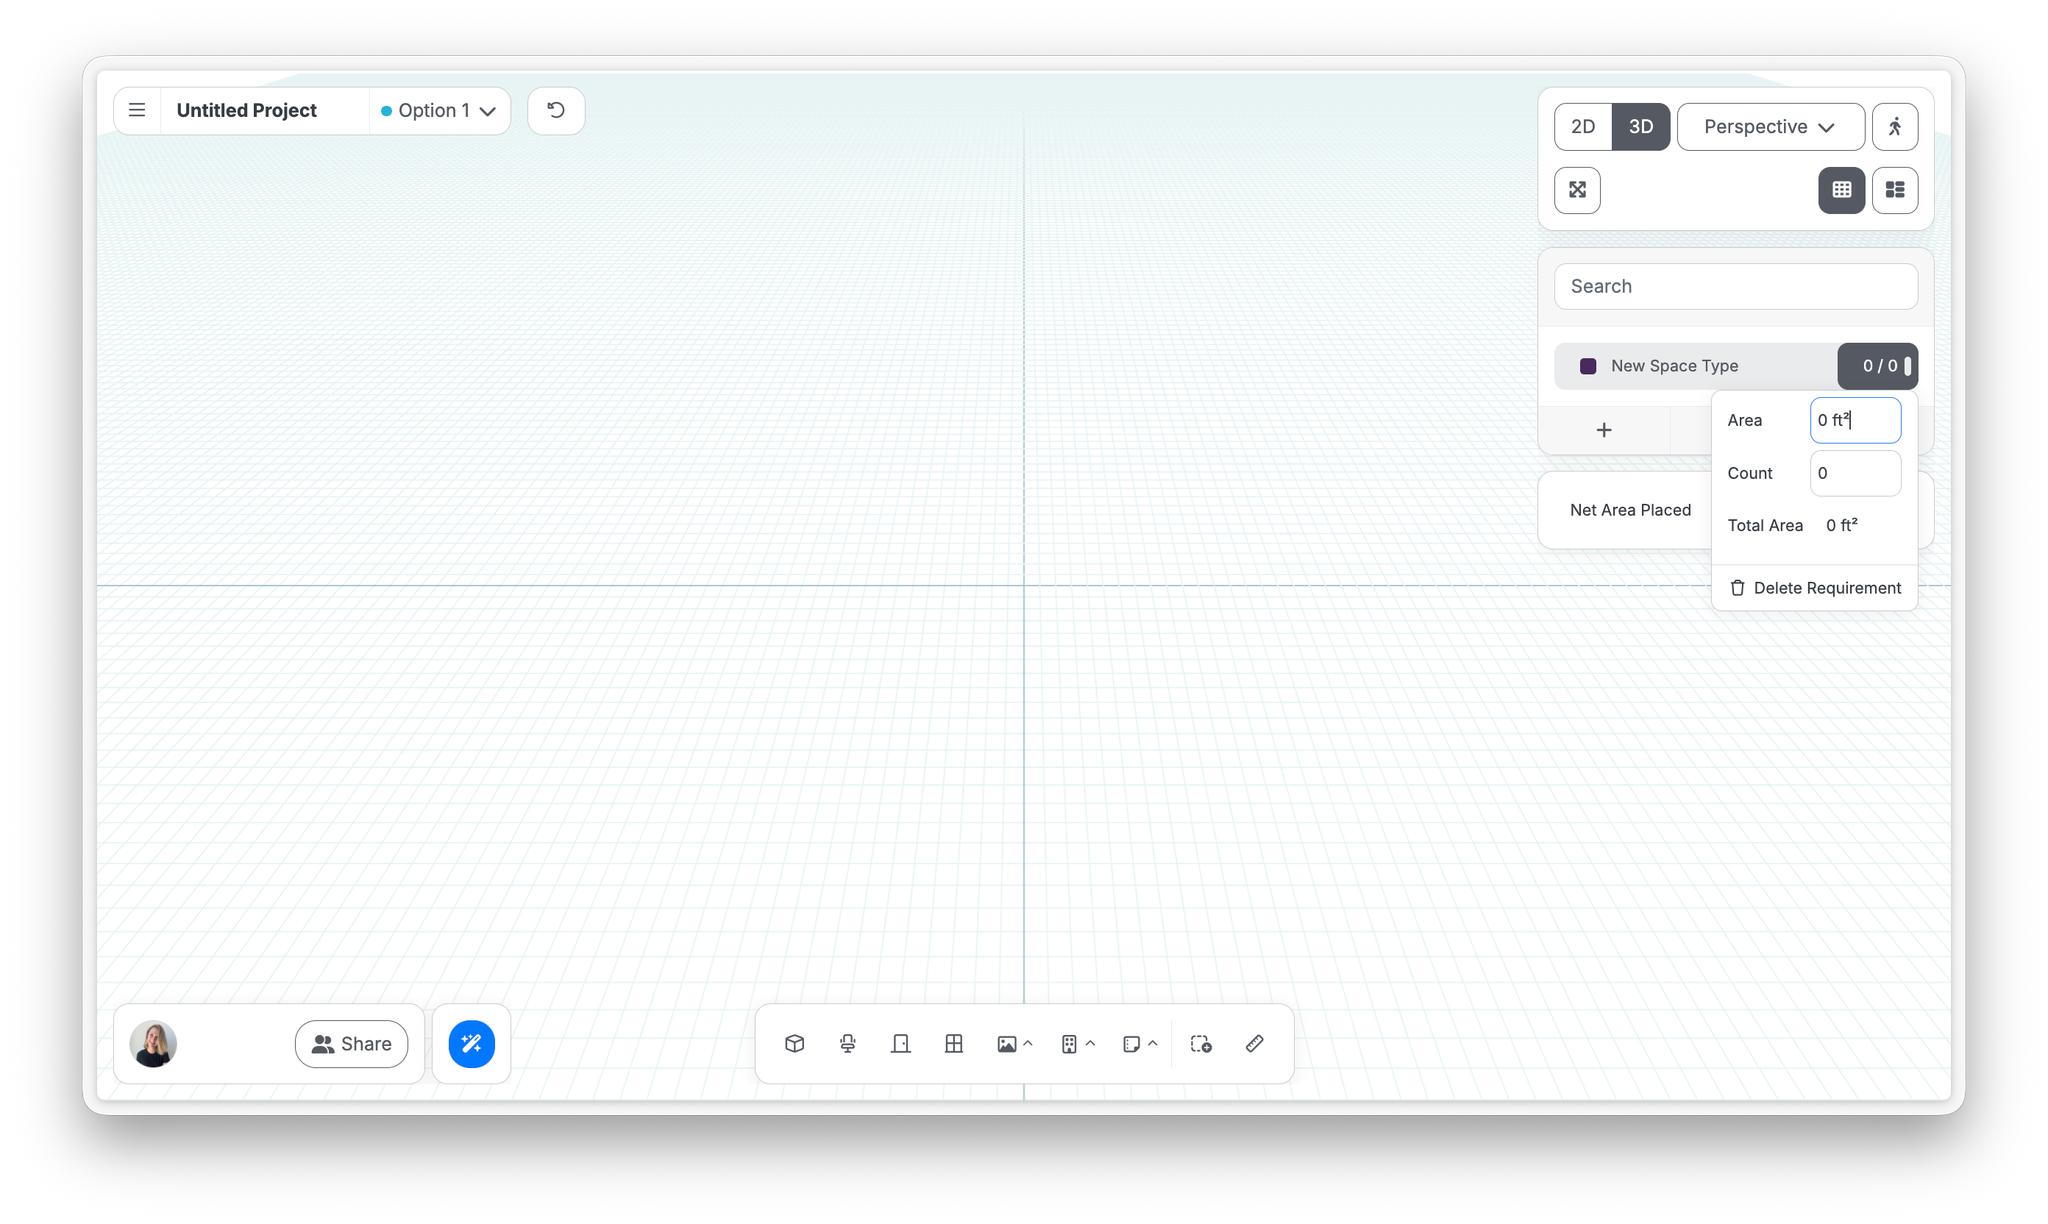
- In the program panel, click Add program requirement (+)
- For each requirement, set any of:
- Name
- Color
- Count: how many of this space you need
- Area: target area per space
- Nested program requirements: drag and drop a requirement on top of another to create a nested requirement or program group/department. Watch the cues as you drag: a guideline means you're reordering, a gray fill means you're nesting. You can add additional layers of hierarchy the same way, and adjust a group's gross-up factor right in the panel.
The Space Program editor
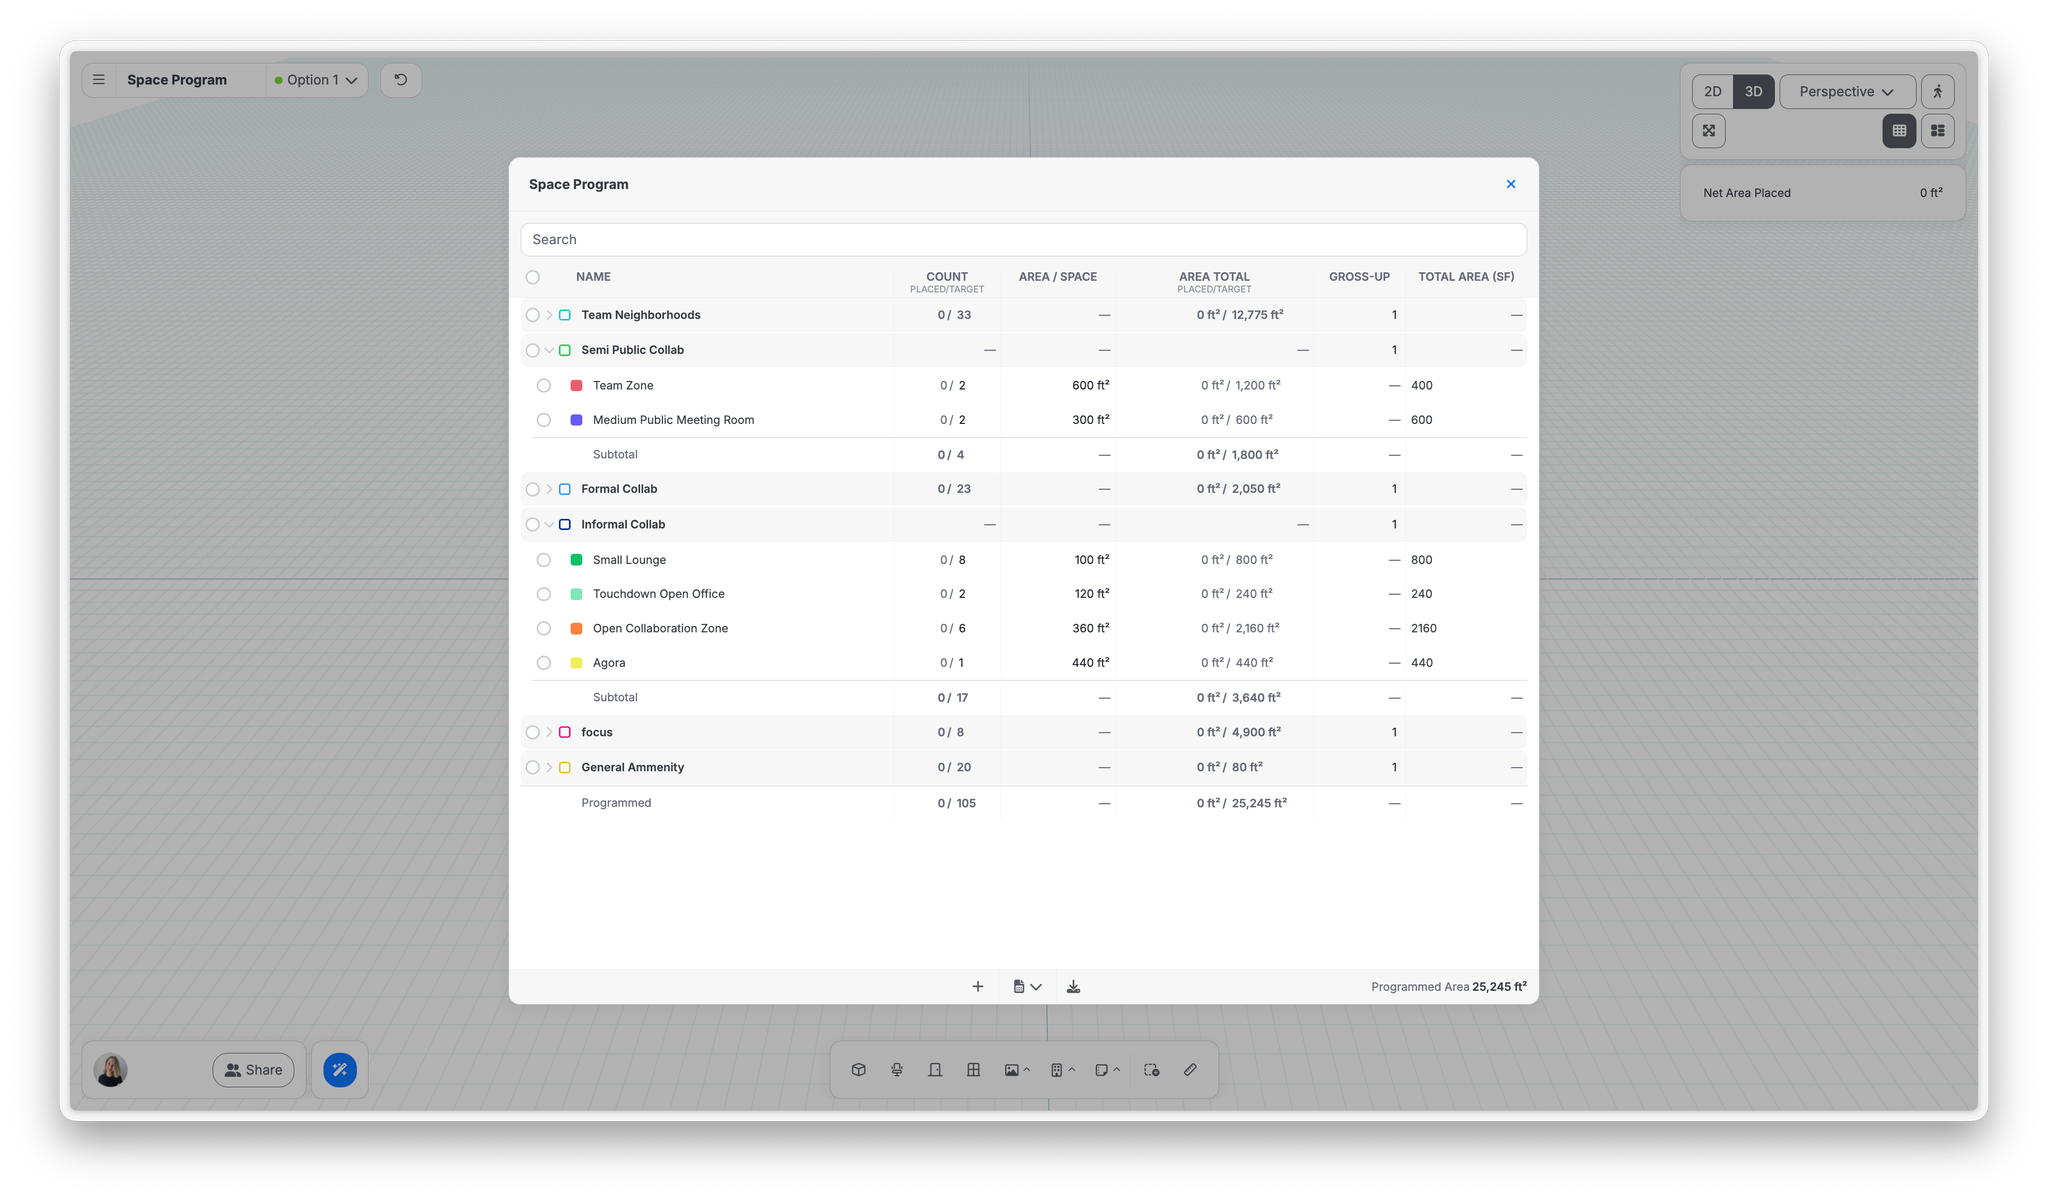
For bigger programs, open the full table. Click Edit Space Program at the bottom of the program panel, or the table icon on a requirement row. The panel expands over the canvas with one row per requirement.
- Columns. Name, Count (placed/target), Area / Space, Area Total (placed/target), and Gross-up. Min Dimensions (width × depth) shows up once a requirement sets them, and custom properties from your spreadsheet get their own columns. A column stays hidden while every requirement leaves it empty.
- Edit in place. Click a cell and type. Select several rows of the same kind first and the edit applies to all of them.
- Groups and subtotals. Expand a group and its totals move to a Subtotal row under its children. Gross-up is editable on group rows.
- Unprogrammed. Spaces placed without a matching requirement collect under an Unprogrammed heading at the bottom.
- Select and act. The checkbox in the header selects everything visible. With rows selected, Insert in project places one of each, and the trash icon deletes them after a confirmation.
- Search. The box at the top filters the table. Actions only touch rows you can see, so a filtered-out row won't get deleted by accident.
- Totals. The footer shows Programmed Area, Program Net, and Program Gross.
On view-only projects you can open the table and export from it, but not edit.
Place spaces from requirements
With requirements defined, use Insert in Project to generate spaces from the program, or simply drag and drop a requirement onto your canvas.
- Spaces dragged from the panel come in with an area lock and walls by default. Unlock the area to stretch freely, and toggle walls on or off.
- Spaces will come in square shaped (if no default width and depth is defined) with a default wall thickness.
- Library spaces named the same as your requirements are recognized and tracked automatically; if named differently, select the space and reassign it from its capsule menu.
- To drag and drop multiple spaces, hold down shift and select your requirements, then drag and drop to the canvas.
- You can also drag and drop departments or groups. Dropping in a department will create a block the sum total area of the spaces that make up the group.
Finding placed spaces: hover over a requirement in the program list and its placed spaces darken on the canvas. You can also search for a specific requirement in the panel.
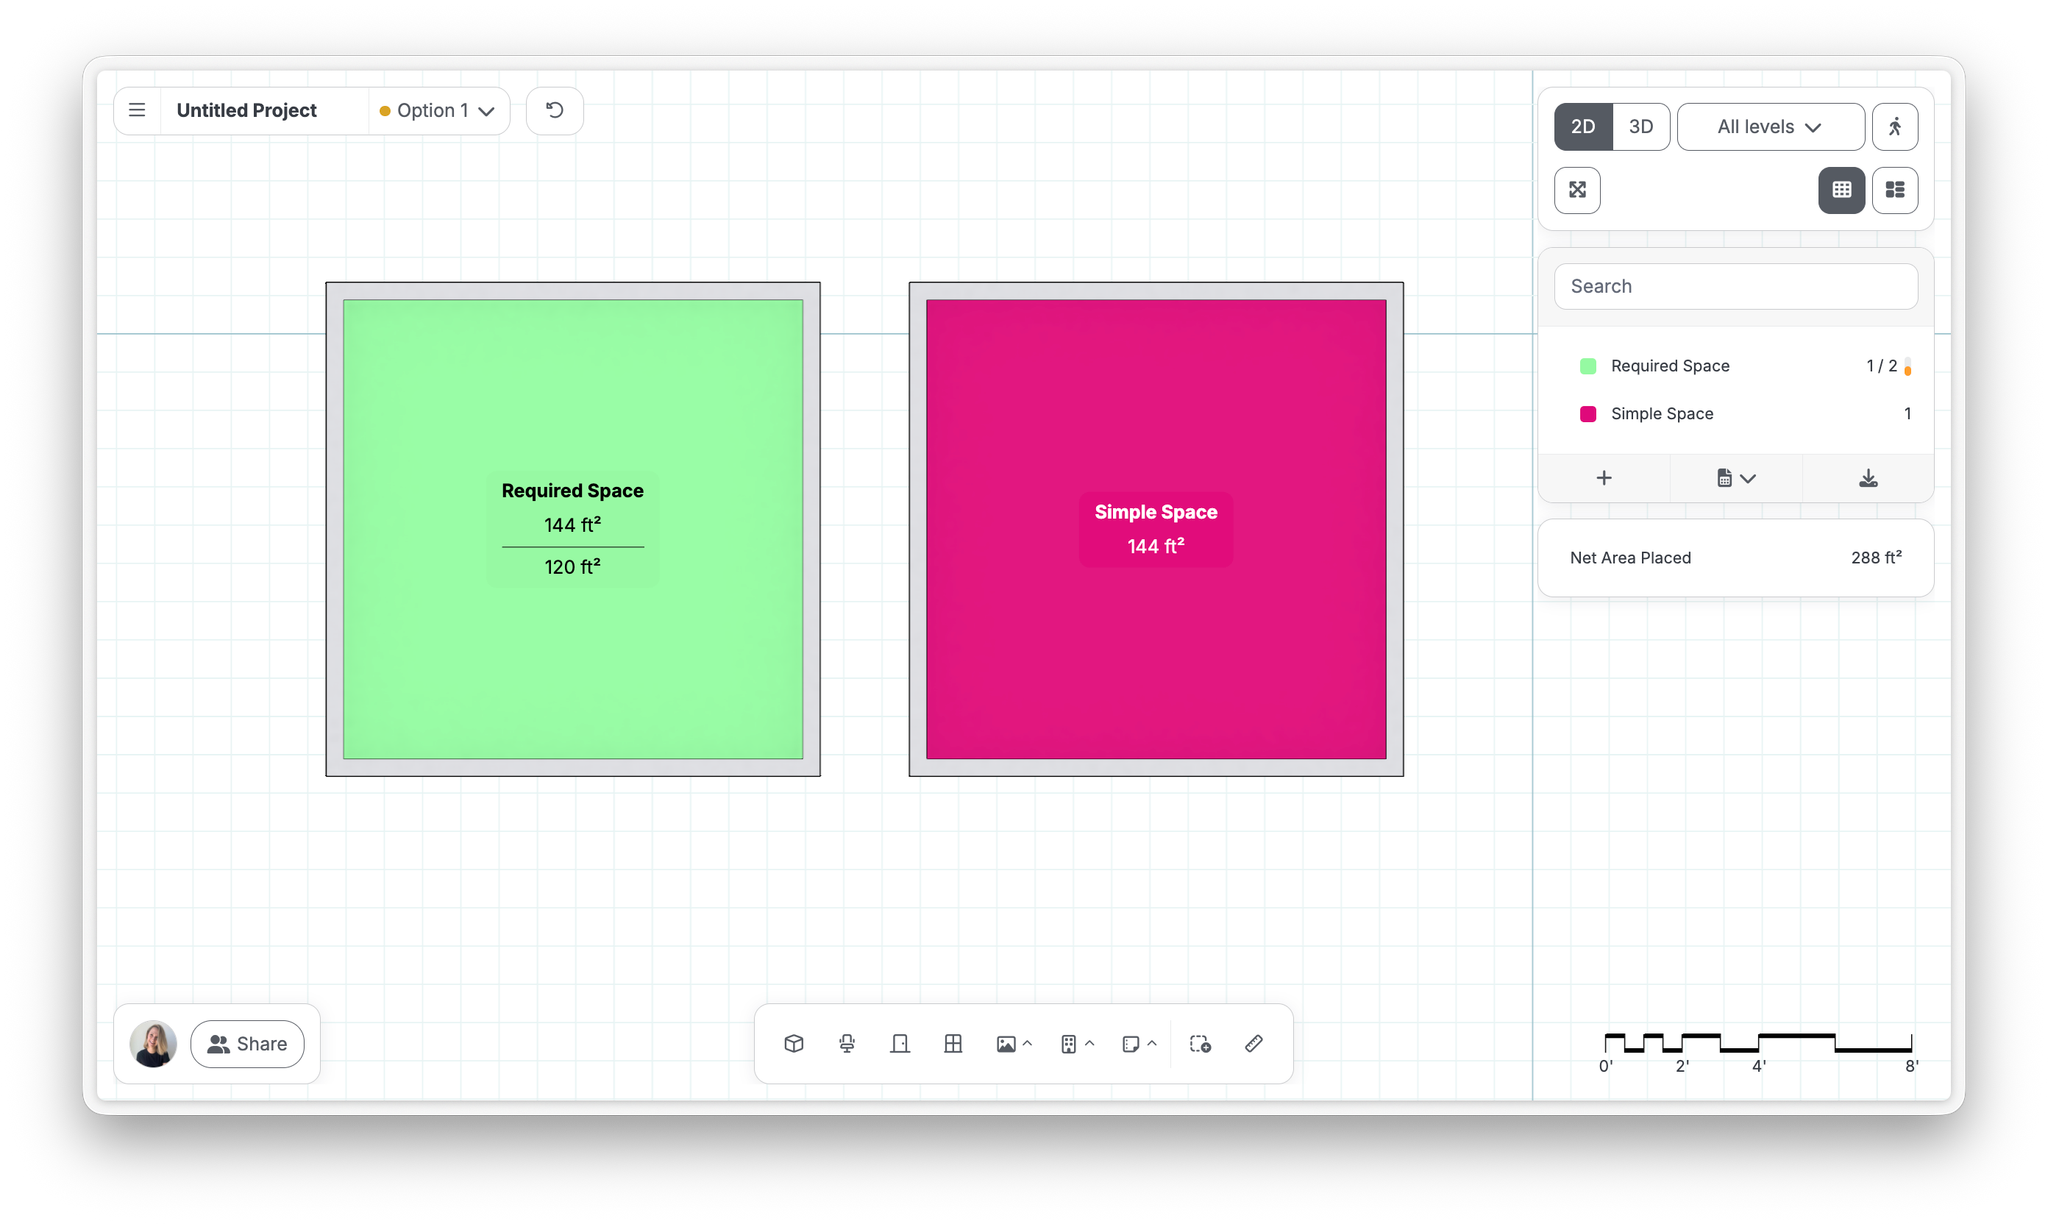
Tip: You don’t need to always bring in a program or manually create a requirement to use Hypar. You can simply use the space tool to create a space. If you do so, you’ll notice a slight difference in how that space shows up in your program panel and on your canvas.
Import from dRofus
Choose Import requirements... → Receive from dRofus to connect to your dRofus database and bring in requirements directly. Hypar can also send your design back to dRofus. See Work with dRofus.
Last verified against Hypar v0.2.045 — October 8, 2026.